Astrophotography on a fixed tripod is easy. For a beginner astrophotographer it is a very good way to get started. Fixed Tripod Procedure
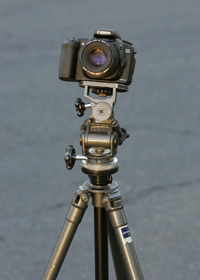
When you put the camera on a tripod, lock everything down on the tripod to increase its rigidity. Set the lens focal ratio to its fastest f/stop, usually f/2.8, f/3.5, or f/4 with most zoom lenses that come with DSLR cameras these days. If you have a zoom lens, set the lens to its widest setting which is the shortest focal length. For example, if you have an 18 - 55mm zoom lens, set it to 18mm. Using the widest setting will let you expose longer before the stars trail. If you have more than one zoom lens, start with the one that has the shortest focal length with the widest field of view. See section 408, Focusing Camera Lenses, for tips on how to focus your camera on the stars.
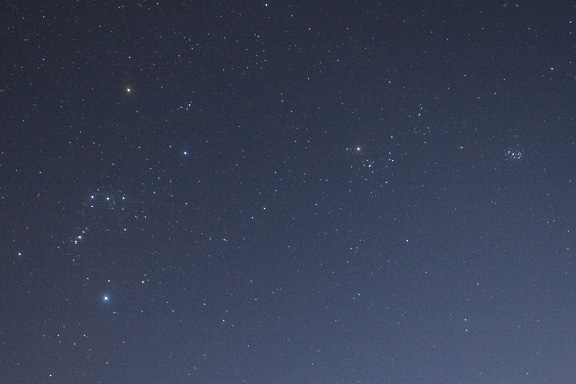
Point the camera to frame the scene or the constellation that you want to take a picture of. Sometimes it can be hard to see anything through the viewfinder, so just take a guess and aim it the best you can by dead reckoning. Take a test shot. Examine it on the LCD on the back of the camera to see if it is framed correctly. If not, adjust the camera's aim and take another test shot. It can help to make the image more interesting if you put something in the foreground, such as some trees. It helps if you have a remote cable release so you don't accidentally move or shake the camera when you open the shutter. If you don't have one, you can open the shutter for exposures up to 30 seconds with the self timer on the camera. When you first start out, use ISO 1600. Shoot some test exposures. The correct exposure will depend on how bright your sky is. If it's very bright, like at a light polluted location inside of a city, you won't be able to expose very long before the sky gets too bright. If you're at a dark-sky site, you'll need a longer exposure. You want to have some tone, or color in the sky. It should not be pitch black. Examine the histogram as we described in section 508, Determining the Correct Exposure. Stopping down the lens to a smaller aperture is not a solution to the problem of light pollution. As you stop down you will record fewer and fewer stars. If you want to record faint stars, the real solution is to find somewhere dark to shoot. If the sky in your image has an ugly brown color from light pollution, correct it in the camera by using a custom white balance set on the sky. As your exposures get longer, the stars will trail more. This will also depend on the focal length of the lens you are shooting with. For a given exposure, stars will trail more with longer focal length lenses. Stars trail on a fixed tripod shot, of course, because the Earth rotates. Experiment with different exposure times and ISOs for the focal length you are shooting with. You will record the faintest stars with a high ISO, fast focal ratio and long exposure. If you are shooting scenic shots or constellations, your goal is to have some color in the sky without excessive star trailing. Of course, longer exposures with star trails can also be interesting. We'll talk about star trail photos in the next section. Fixed Tripod Exposure Suggestions Try these combinations of exposure, aperture and ISO as starting points:
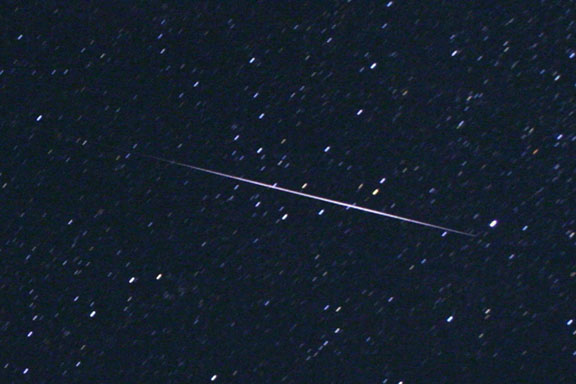
Meteor and Satellite Photography You can also shoot meteors and satellites on a fixed tripod.
Meteor photography is fairly simple, but it does require a lot of luck. Satellite photography just requires advance knowledge of the time that the satellite will be visible, and its location in the sky. Some satellites have highly reflective parts that will reflect direct sunlight, such as this Iridium satellite flare. To capture a meteor in an image, you usually need to keep shooting frames one after another for several hours in the hopes that one will happen to burn up in the upper atmosphere exactly where your camera happens to be pointing. This is the luck part. Meteors are tiny bits of dust and material that burn up in the Earth's atmosphere. These small particles are left behind by comets as they pass through the solar system. The comets heat up as they come near the Sun, and gas and dust are ejected from the nucleus. This dust remains behind in orbit around the Sun after the comet's passage. When the Earth passes through one of these dust trails, a meteor shower can occur where we can see many meteors. The meteor shower is named after the constellation from which the meteors appear to originate. For example, the Perseid meteors are from dust left behind by Comet Swift-Tuttle and if you trace the path of many Perseid meteors back across the sky, they will all appear to radiate out of a point in the constellation of Perseus. This point is called the radiant. This however is really just an effect of perspective, just as train tracks disappear to a point in the distance, even though they are parallel. The cometary dust and debris that burns up high in the Earth's atmosphere that we see as a meteor is usually about the size of a grain of sand or small pebble. Larger pieces can produce really amazing meteors that leave a fiery trail behind them as they burn up. Some of the larger ones can even explode in the atmosphere. Pieces that survive and reach the ground are called meteorites. Go someplace as dark as possible for the meteor shower. You won't see many at a light-polluted observing location, and you'll have even less chance of recording one with a camera. Use your camera's widest aperture and ISO 1600. Use the histogram and test exposures to determine the correct exposure for your sky conditions. It helps to have a remote release timer so you can just set it to keep taking as many frames as you can for as long as possible. The constellation that the meteors in a particular shower appear to come from is not a good place to point your camera. You'll get much longer meteor trails if you aim your camera 45 to 90 degrees away from the radiant, preferably aiming at the darkest part of the sky. When the radiant is just rising in the east, don't aim your camera towards the west as you won't see many meteors there. The best time of night to shoot meteors is after midnight when the radiant is high in the sky. If you have a wide-angle zoom lens, use it at its widest setting and shortest focal length. This will include more sky in the image and you'll have a better chance of catching a meteor. Depending on your observing location, you will probably need to take some extra precautions to keep dew off the lens if it is pointed up all night long. An anti-dewer wrapped around the lens works best. You may also need some extra camera batteries if you are going to shoot all night long to increase your chances of capturing a meteor in an image.
|
|||||||||
|
Back | Up | Next |