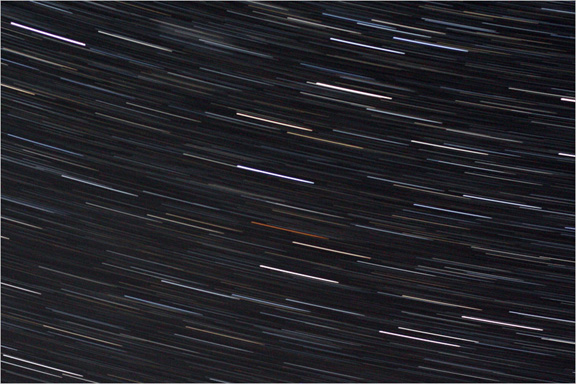
In long time exposures, cameras on a fixed tripod will record stars as trails because of the Earth's rotation. This can produce some interesting images. In the days of film, you could only shoot long star trails at a dark-sky site. But today, with digital cameras, even if we are at a light-polluted site, we can still shoot star trails. We don't want to stop down too much or use too low of an ISO because we won't record faint stars. To deal with a bright sky or the thermal signal on a warm night, we can simply shoot shorter exposures and then stack a lot of them together to equal one longer exposure.
If you point your camera at the North Star you can get circumpolar star trails that arc around Polaris. If you point your camera east or west or along the celestial equator, you can get straight trails. Even at dark-sky sites, the longest exposures you will be able to use will be limited by thermal signal, especially if the ambient temperature is high. Thermal noise is noise generated inside the camera from heat that shows up as hot pixels and red, green and blue blotches in the background. As you shoot more and more exposures, the temperature inside your camera will also go up, leading to even more thermal noise. We can easily deal with this problem by keeping our exposures relatively short. This is where a fast focal ratio and high ISO help. For normal deep-sky images, we could use in-camera long-exposure noise reduction, which removes most of this thermal noise, but for star trails, we can't. This is because we need to shoot continuously, frame after frame, with as little pause as possible. Long-exposure noise reduction pauses the camera between frames to apply the noise reduction. It will pause for a time equal to the original exposure. So if you are shooting one-minute exposures, and you pause for one minute, you will have big gaps in your star trails. If thermal signal is a problem, we can also use the technique of dark-frame subtraction, which we will discuss in the advanced techniques section. Once you have a series of frames that you want to turn into a star trail image, you can use programs like StarTrails by Achim Schaller, StarStax by Markus Enzweiler, or StarMax by Gilbert Grillot and Sylvain Weiller. These programs will combine your images automatically. Star Trails Exposure Suggestions Try these combinations of exposure, aperture and ISO as starting points:
If it is colder, you can try longer exposures at lower ISOs. Experiment! The great thing about digital cameras is that you can get immediate feedback. You can try a lot of different things because it doesn't cost anything to shoot a lot of test frames that will allow you to learn by trail and error. Notes If you are going to shoot a lot of exposures, a remote timer release such as Canon's TC80-N3, or JJC's timer remote control really makes the job much easier than trying to do it by hand. If you are going to shoot for more than a little while on a night with high humidity, dew may form on your lens. If this might be a problem, use an anti-dewer wrapped around the lens.
|
|||||
|
Back | Up | Next |