AutoStakkert! by Emil Kraaikamp is a great freeware program for grading, aligning, and stacking planetary images. It will work with an AVI video, or with a series of FIT, BMP, TIFF, PNG, or JPEG still frames. However, it does not do any wavelet sharpening. AutoStakkert! was originally designed to work with monochrome videos produced by dedicated planetary imaging cameras, but it will also work with color videos shot by DSLR cameras. If shot in the camera as MOV files, they first need to be converted to a standard uncompressed AVI format.
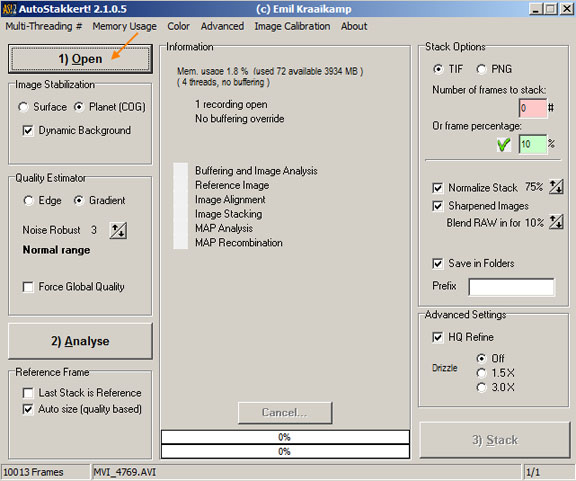
Overview AVIs in AutoStakkert! As we discussed in section 2 of this chapter, if we shoot video in a DSLR camera, it is saved in a MOV file format that must be converted to an AVI format for AutoStakkert! to work with. Some programs that record Live View will record directly in AVI format. Unfortunately, there are lots of different flavors of AVI. Some will open directly in AutoStakkert! and some need to be opened and re-saved as an AVI in VirtualDub as we described in the previous section. Here is a list of those that will open directly: Still Image File Formats in AutoStakkert! Other programs that record Live View will produce a series of still images in different file formats. Images Plus records them in an SID file format that can be converted to 16-bit FITS, 16-bit TIFF, 8-bit BMP or 8-bit JPEG file format. Astro Photography Tool records Live View as a series of 8-bit JPEG images. 1. Open the Video or Image Files First click the large button on the top left of the operations screen labeled 1) Open. You can also click and drag and drop a file onto AutoStakkert!'s operation window. If you want to load a series of still images you have to click and drag and drop them. If you hover your mouse cursor over an item, more information about it is usually revealed.
2. Analyse the Images Before analyzing the image, take a look at the image display window. If the image is small in the frame, click and drag the Set Size sliders. This will speed up buffering and image analysis and creation of the reference frame image. If you change the size after analysis, it will be forced to run the analysis again when you stack. Click on the large button at the bottom of the left hand column labeled 2) Analyse.
AutoStakkert! will now examine and analyse each individual frame in the video and create a stack that will be used as a reference frame. This is a carefully created stack onto which all the alignment points for all frames will be aligned. As AutoStakkert! analyzes the frames you will see a progress bar move across the bottom of the second column where information about the processes being conducted is displayed.
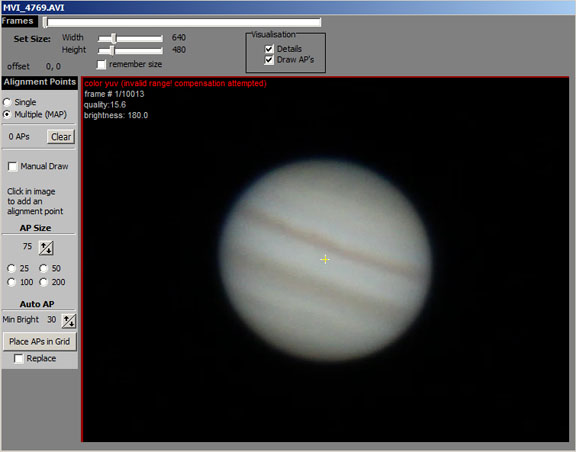
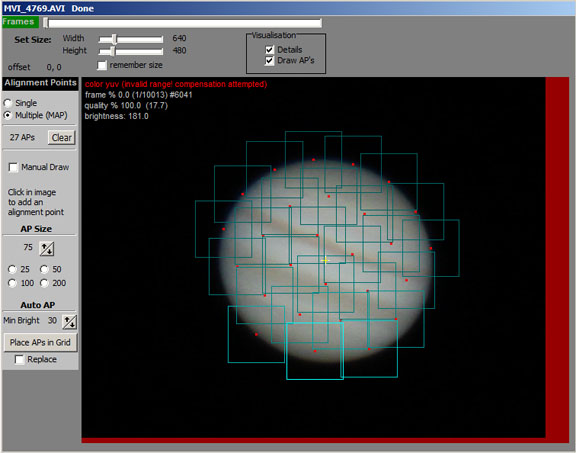
After the analysis is finished, AutoStakkert! will display a quality graph at the bottom of the information column. Two plots are superimposed on each other. The jagged up-and-down plot shows the frame quality in the order that the frames were shot - it shows the varying quality of the frames based on the seeing. The green line is a plot of the quality of the frames sorted by best quality first, then dropping off to lesser quality on the right. 3. Set the Image Alignment Points Now we will go to the image display box and set the image alignment points. When working with AVI files converted from MOV files shot by a DSLR, you may see a line in red at the top left of the image display window that says "color yuv (invalid range! compensation attempted)". This means that AutoStakkert! detected that the file was in a YUV file format that it didn't like. AutoStakkert! will still work just fine with this file anyway.
You can manually add alignment points in automatic multiple alignment mode by left clicking in the image. Right click to remove an alignment point. Use the mouse wheel to change the size of the alignment point. The results are seen below.
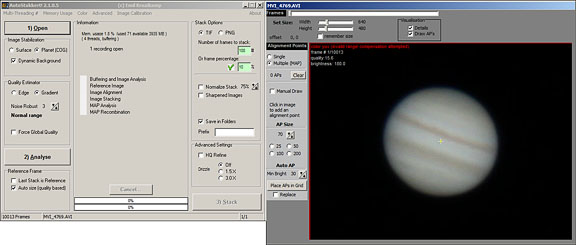
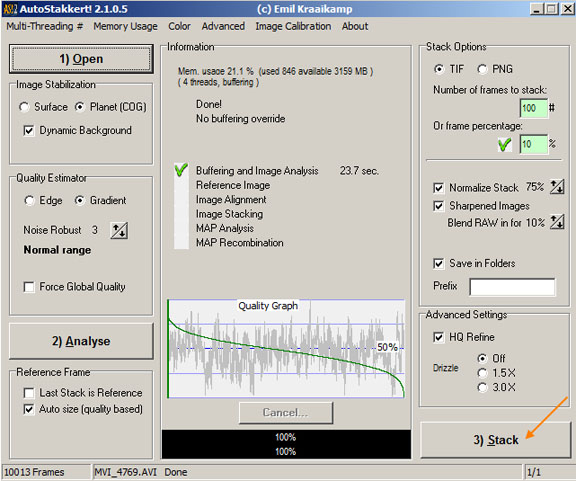
4. Stack the Images Now we go back to the operations screen and work in the "Stack Options" column at right. Finally, click the 3) Stack button at the bottom right-hand corner.
AutoStakkert! will now go through all of the images and align and stack them precisely. As it does this, you will see the progress indicators at the bottom of the middle column move, and a checklist in the center of this column get checked as each task is completed. The final stacked raw image, as well as a sharpened version, will be saved in a special folder in the directory with the original AVI file.
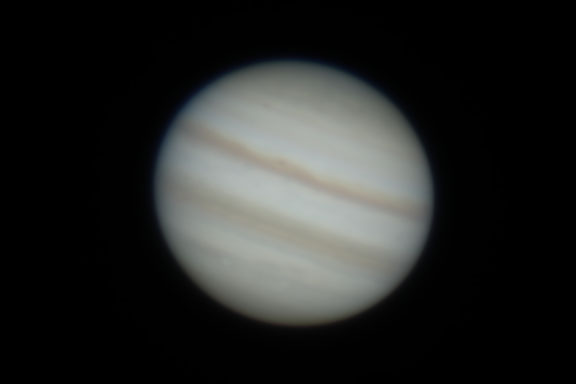
Above we can see the potential of the data in the raw stack with AutoStakkert!'s default sharpening applied to it. There are additional adjustments and enhancements that we can perform on the image that we will cover in subsequent sections. AutoStakkert! Tips from Emil
This tutorial was done with AutoStakkert! version 2.1.0.5. |
|||||||||||||||||||||||
|
Back | Up | Next |