Backyard EOS (BYE) is commercial software by Guylain Rochon that controls your Canon DSLR camera and that will record AVIs from Live View that will open in AutoStakkert!, AviStack, Images Plus or RegiStax. BYE controls most of the important settings, such as shutter speed, ISO, aperture (of a Canon camera lens), and white balance, through a single USB cable hooked up to your computer. In addition to capturing Live View for planetary work, BYE will also help you focus, and automate a series of still-frame exposures in an imaging session for long-exposure deep-sky imaging. Three great things about BYE:
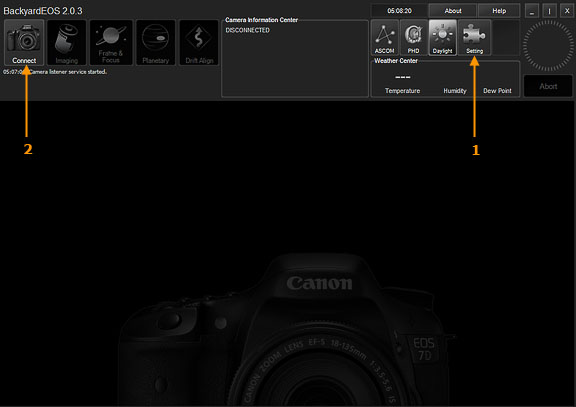
Before installing BYE, install the Canon software that comes with the camera first to be sure you have the correct drivers for the camera, so the operating system will see it when it is connected via the USB cable. After installing the camera software, Canon's EOS Utility will open when the camera is connected to the computer and turned on. EOS Utility will control your camera, but it will not record Live View. You can simply close EOS Utility and launch BYE, or you can go into EOS Utility's preferences and set it so that it does not open when the camera is connected. Note that BYE only works on Microsoft Windows with Canon DSLR Cameras. BYE Step-by-Step Procedure for Planetary Imaging
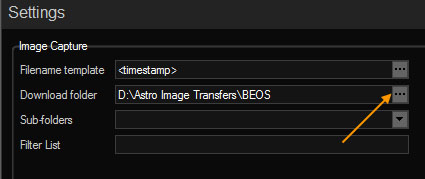
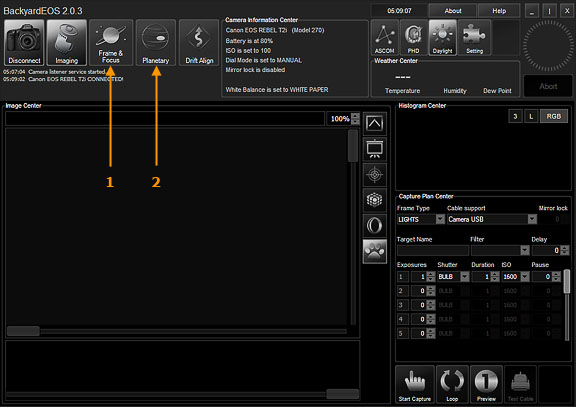
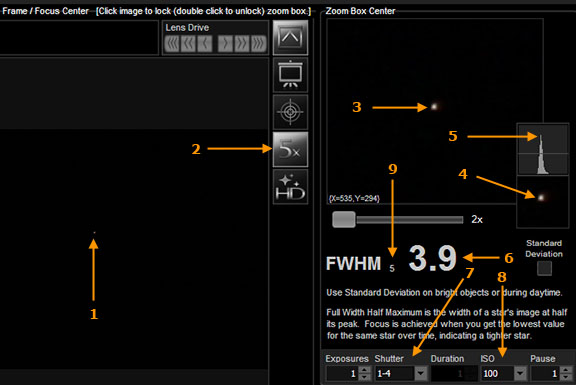
The frames will then be recorded as an AVI file to the directory you specified during setup. You can open this AVI video file in a program like RegiStax, AviStack or AutoStakkert! to grade the frames and align and stack them. Focusing with BYE's Focus Center I recommend focusing on a star near to the planet you want to shoot. Using BYE's FWHM readout on a star in the Focusing Center will help you quickly and accurately focus your telescope. It is much more difficult to focus by eye on low-contrast planetary detail, especially in less-than-great seeing. The numerical readouts will give you an objective assessment of the accuracy of your focus instead of a subjective visual guess as to what is the best focus. Use a reasonably bright star as close as possible to the planet you want to shoot. This will minimize the chance of your primary mirror moving and throwing off collimation or focus when you move to the planet.
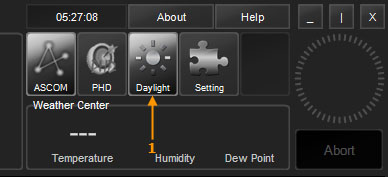
Night Vision Mode BYE also offers a night-vision mode with a red display. The button that controls the display is at top right.
Click this button (Figure 6, Number 1) to change between Daytime mode and Night-Vision mode.
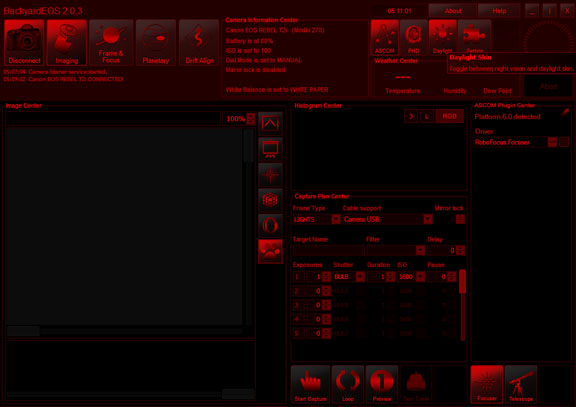
Night-vision mode is seen above in Figure 7.
|
|||||||||||||||||
|
Back | Up | Next |