This movie of the Milky Way and stars moving across the sky at a star party was made with a DSLR camera on a fixed tripod shooting consecutive still frames. Each individual frame was a 15 second exposure at f/2.8 at ISO 1600. The movie is made of 93 individual frames. You can see the stars and Milky Way moving across the sky due to the Earth's rotation.
A movie or video is really a series of still photographs that are shown rapidly one after another to create an animation that has the illusion of motion.
A time-lapse movie uses long-exposure astrophotos to show the sky moving at an accelerated rate. For example, the Milky Way rising and setting in the south may take six hours. By shooting 30 second exposures continuously for those six hours, you end up with 720 individual frames. If you put those frames together into a movie and show them at 24 frames per second, you can compress those 6 hours down into 30 seconds. This can produce a really interesting effect.
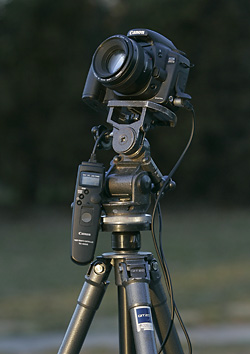
Note that although this is in the advanced chapter, from the astrophotography standpoint, shooting the individual frames is very basic. Nothing more than a camera on a fixed tripod and a remote interval timer release is needed.
You can create time-lapse movies with a DSLR camera. You don't even need a camcorder, or a DSLR that can shoot video. You just shoot long-exposure still photos one after the other, and put them together later in software.
You can also put a smaller number of consecutive frames together to animate things such as a comet's motion relative the a star field.
Comet Lulin moves against the starry background in this time-lapse movie. The telescope was tracking on the Comet's nucleus. The animation is comprised of 19 two-minute exposures. If you look closely, in the first couple of frames you can see a geosynchronous satellite moving across the top of the field. The dark spots in the frame that don't move are shadows from dust on the sensor cover glass. The glow in the upper and lower right corners is from so-called "amp glow", caused by electroluminescence in the transistors in the readout amplifier of the camera's sensor.
Procedure
A DSLR camera can be automated with remote-release timer.
Use a camera on a fixed tripod.
Use a 30 second exposure.
Use a fast lens, something like f/2.8. If you don't have that fast of a wide-angle lens, try longer exposures with what you have.
Use ISO 1600, or if your camera has it, ISO 3200.
Set the in-camera resolution to something like 1728 x 1152. You don't need full resolution for a video, and this will allow you to get more frames on a memory card, and it will reduce the noise.
Shoot JPEGs in the camera at the highest quality compression setting.
Turn in-camera long-exposure noise reduction OFF.
Disable mirror lockup, turn it off.
The exposure will vary from sunset to dark. You can try shooting on AV mode for automatic exposure, but you might have to go to manual once it gets completely dark. Or once it is completely dark you may have to dial in some plus exposure compensation. You really have to experiment to find the right settings for your particular circumstances.
Experiment with the longest exposure for when it is completely dark as this will vary depending on how bright your sky is from light pollution, or if the moon is up. Longer is better. You do not want the sky to be black if you want to record faint stuff like the Milky Way.
Shoot on a dark, clear night with no moon, if you want to get the Milky Way. Obviously it has to be a time of the year when the Milky Way is actually up to get it. Summer is best because the summer Milky Way in Sagittarius is the brightest part of the Milky Way.
If you are at a reasonably dark sky site (Milky Way visible, say mag 6 naked eye limiting magnitude), then try 30-second exposures at f/2.8 at ISO 1600 for your full night exposures.
Use a remote timer release like the Canon TC80-N3 or JCC Remote Control Timer to shoot time-lapse frames. If you don't go longer than 30 seconds, you might be able to get away with not even using a remote intervalometer timer, you might be able to just use a simple remote release. All it has to do is be able to lock, and the camera should just keep shooting frame after frame on the continuous setting if your exposure is 30 seconds or less and you don't have to use the bulb setting.
Set the timer up so that you just keep shooting 30-second exposures one after the other for however long you want it to run or until the memory card gets full, or until the camera's battery dies. Be careful if you fill the card up or if the battery dies, because sometimes you can corrupt the card if this happens. Luckily this is rare.
Once you have determined the correct exposure for the night sky, you can go into the in-camera settings and jack up the contrast a bit, and adjust the color balance to your taste. This saves having to do it to each frame in post-processing.
If you figure 24 frames per second in the video, you can calculate how long your movie will last. Say you shoot 30 second exposures, so that means every 12 minutes of real time, you get one second of video run time. If you shoot for 6 hours, you would have 30 seconds of video.
If you are going to shoot for multiple hours, you will probably need a 12-volt deep cycle battery to power an anti-dewer wrapped around the lens. Depending on your camera, you may also need a 12-volt power supply to power the camera all night long.
Software to Make Movies from Stills
You will need a software program to turn your individual still images into a movie. On the PC you can use Windows Movie Maker, it is free. On the Mac you can use iMovie.
There are also other freeware programs you can use, such as StarTrails, JPGVideo, and PhotoLapse, all of which will turn JPEG image files into a movie.
On the high end there are professional movie production software programs like Final Cut Pro for the Mac and Premiere for both Mac and PC. Beware that these programs are very complicated to use and are expensive.
You can also use Photoshop to create an animation and turn it into a Shockwave Flash movie that can be embedded into a web page and viewed with any web browser. There are also other freeware converters that will turn an AVI movie file into a Flash movie.
After you have shot your images, you will need to decide on the size your movie will be displayed at. Then you will need to re-size your originals to the resolution of the movie. For example, a 1080p high definition movie is 1920 x 1080 pixels. Another high definition format that is a little more manageable is 720p, which is 1280 x 720 pixels. Watch out though, these high definition formats can produce ridiculously large files if you have a lot of frames in your movie.
A more manageable size would be something like 640 x 480 pixels, which is VGA resolution.
Once you decide on a display size, if you have a lot of frames, you can run a batch file action in Photoshop to re-size all of the images automatically so you don't have to do each one by hand.
Depending on the program you use to put the still frames together into a video, you can experiment with using the "fade between frames" feature to make the video smoother.
To save the movie, you will need a codec to compress your video file into a manageable size. A "codec" is a compression / decompression algorithm. You should already have some available on your operating system, but you may want to look into downloading a codec like XVID or DIVX which will offer much better quality at a higher compression ratio.
Experiment with the quality that you save the video at, as some of them can be really bad. Naturally, the good quality ones will take up more space, so it's a compromise.
Time-Lapse Movies from Stills - The Bottom Line
It is easy to shoot a series of still photographs on a fixed tripod with a remote release timer intervalometer or computer.
These images can then be put together into a time-lapse move which shows the motion of the stars over time.