Once you have advanced a little bit in learning the craft of astrophotography you will realize that the two most important things you can do to improve your images are to gather more signal to improve the signal-to-noise ratio, and use calibration frames to remove unwanted thermal signal.
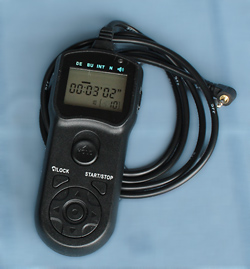
You have already gone to the trouble of setting up your telescope, polar aligning, focusing, finding and framing your astronomical subject and shooting test exposures to determine the correct exposure. This is the overwhelming majority of the work involved in taking an astrophoto. Why press the shutter once or a couple of times, and then move on to another object? Shooting multiple frames can greatly improve your images. You're already set up, so just keep firing away! A device like Canon's TC80-N3, JCC's Timer Remote Control, or Nikon's MC-36 Remote Trigger with Timer, can automate an imaging session. You can program it to take a series of exposures at a fixed long-exposure time, and it only costs about $30. It plugs into the remote-release bulb plug on the outside of your camera. You can set it to take, for example, 20 five-minute exposures. During this time you can observe through your friend's scopes or even take a nap! You can even use a remote release timer with mirror lockup and the bulb setting for long time exposures, but there is a trick.
The remote release timer will then signal the camera to start the process and the mirror will lock up, the self timer will count down, and the shutter will open. Computer Control The latest DSLR cameras offer complete camera control over all functions through a single USB cable connected to a computer. With such a setup, you can use Live View to focus with the image displayed on the laptop's screen where it is easy to view. Then you can use software to change camera settings such as ISO and shutter speed, and program the camera to take a series of exposures. You can even download the files automatically to your computer's hard drive.
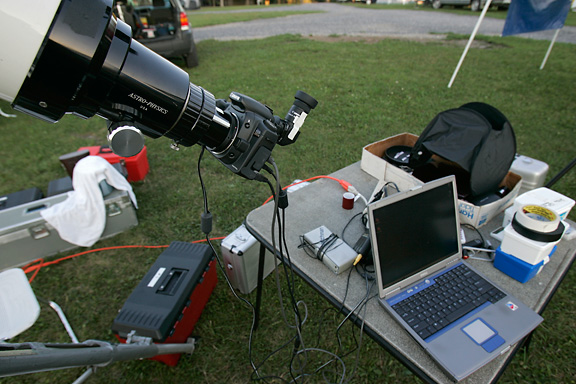
Canon offers camera control software that comes bundled with the camera. With the latest Canon cameras, you can control all of the functions, including bulb exposures, with a single USB2 cable. With older Canon DSLRs, you need two cables: one to control the camera's functions, and a serial-to-bulb port cable to control exposures longer than 30 seconds. You can get such cables from Hap Griffin Astrocables, or Shoestring Astronomy. You can also use commercial all-in-one DSLR astronomical software, like Images Plus, Nebulosity, or Maxim, to control you camera, focus, automate an imaging session, calibrate your images, and process and enhance your images. Nikon's latest DSLR cameras offer almost complete control of the camera via software. For some strange reason, they won't let you take long exposures through the bulb setting, so you are limited to a maximum of 30 seconds exposure through the single USB2 cable. To access longer time exposures with the bulb setting, you need a second serial-to-bulb port cable. Nikon control software also costs extra - it does not come bundled with the camera. Considering it's price, I would recommend just getting a program like Images Plus or Nebulosity to do everything. To run a computer or laptop in the field at night at a remote location, especially on a cold winter night, you will need a 12-volt deep-cycle battery to power it. This is the advantage of just using Live View on the back of the camera to focus, and automating the imaging session with a JCC timer remote control - you don't need a computer or an extra battery.
|
|||||||
|
Back | Up | Next |