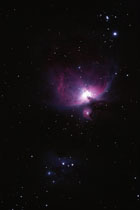
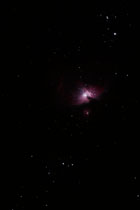
Another method of combining several images with different exposure lengths to deal with the problem of objects with a large brightness range, such as M42, is to combine them together into a high-dynamic range (HDR) image with Photoshop's Merge to HDR Command. It offers the ability to combine multiple individual images with different exposures into a single 32-bit floating-point image with greatly expanded dynamic range. The images to be combined can be 8-bit JPEG originals, or even 16-bit raw digital camera image files. Below is an example done with the same four images of the Orion Nebula used in the previous section on layer mask composites. Here we have a exposures of 600 seconds, 150 seconds, 30 seconds, and 8 seconds. Each exposure is about 2 stops different.
For this example, single JPEG original frames will be used that have been converted to TIFF files and the background's neutralized. Straight raw frames could also be used, but this is more for normal daytime images because our long-exposure deep-sky images need to be calibrated, aligned, stacked, and neutralized. Calibrated raw frames can also be used if saved in TIFF file format, but they must be aligned first. The Merge to HDR Command The HDR Command is accessed under the File > Automate > Merge to HDR.
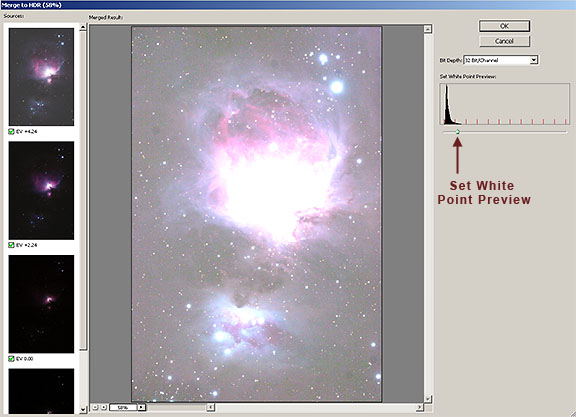
Navigate to the directory where the files to be combined are stored. If the images are already open in Photoshop, select Open Files under the Use: drop-down menu. Click the OK button. All four images then open, and PS tries to align them if the "Attempt to Automatically Align Source Images" box is checked, but it does not always work, so it is better to align the images first in an astronomical image processing program. Set the White Break Point
Once Photoshop analyzes the images and combines them, you can adjust the "Set White Break Point" slider. Photoshop attempts to automatically set this to reveal details in the image. This setting doesn't really matter because it only affects the display in this dialog box. This preview adjustment is saved with the file and applied when the image opens if the image is saved as a 32-bit file. All of the data is still there in the file, even if it looks clipped in this preview image. However, if the file is saved in 16 bits or 8 bits, the preview is applied to the saved data and data can be clipped and unrecoverable. Be sure to save in 32-bits. The dialog box is OK'd and the HDR image will open in Photoshop. The image is then saved as a 32-bit per channel Portable Bit Map (PBM) format file. File > Save As: M42_HDR.PBM. Convert to 16 Bits It is during this step in the process that the data is manipulated and made to look like a normal photographic image. This 32-bit image is still open at this point. It can now be converted to 16 bits using the Image > Mode > 16 bits/channel command. When this command is invoked, the following HDR Conversion dialog box opens:
In the pull-down menu under Method, the HDR conversion dialog box opens offering a choice of four different methods of converting the 32-bit image to 16 bits.
Choose the Local Adaptation method and ok the dialog box.
It is also possible to adjust the histogram in the HDR conversion to 16-bits dialog box.
Open the saved 32-bit HDR.PBM file.
Choose the Local Adaptation method, which allows adjustments to be made to the Toning Curve and Histogram. 1. adjust the black point. Move the black point slider to the right to the point where the mountain of the histogram starts. For this image, we have moved it to 35 for the input and 0 for the output. 2. Click and create and adjustment point in the middle of the curve. Adjust the mid-tones in the image just as you would in Curves. For this image, we have moved it from 60 for the input to 50 for the output.
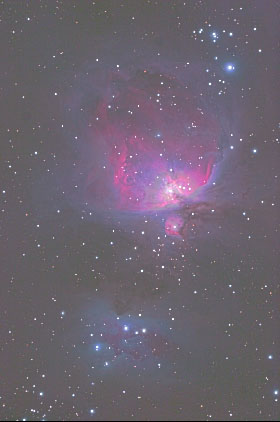
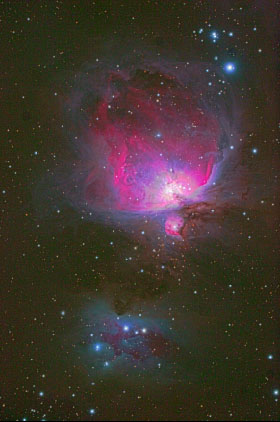
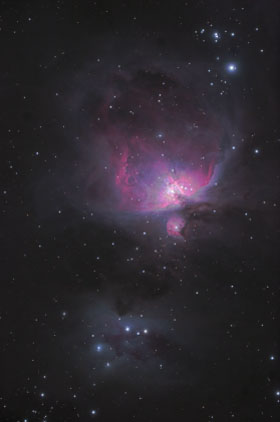
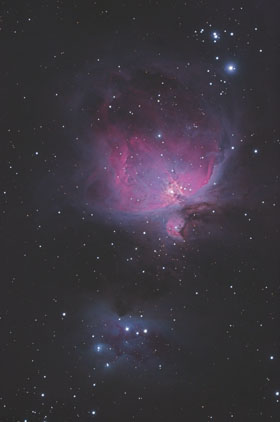
The HDR image resulting from the curves adjustments in the Local Adaptation Curves dialog that were applied above can be seen at left. No image adjustments or manipulations were done to the image after conversion to 16 bits, except a final conversion to 8 bits for saving as a JPEG file. The Photoshop layer-mask method that we covered in the previous chapter is seen at right. The 32-bit High Dynamic Range image in the PBM file contains data that spans a tremendous dynamic range compared to a single exposure. But this data must eventually be converted to 16 bits for adjustment in Photoshop and finally to 8 bits for output to a monitor or printer. Commands, Tools and Filters Only some of the Commands, Tools and Filters available in Photoshop CS2 will work on 32-bit HDR images. The clone tool will work, an you can also crop, rotate, resize, and adjust the Canvas size. The only blending modes that are supported are Normal, Multiply, Difference, Lighten, Darken and Linear Dodge. Filters that work are the Bilateral Blur, Radial Blur, Gaussian Blur, Motion Blur, Add Noise, Unsharp mask, High Pass, Offset, Average, and lens flare. Levels and curves cannot be used on a 32-bit image in Photoshop CS2, it must be converted to 16 bits for access to those commands. More extensive directions and explanations of the controls in the HDR conversion dialog box are given in the Photoshop help files. |
||||||||||||||||||||||||||
|
Back | Up | Next |