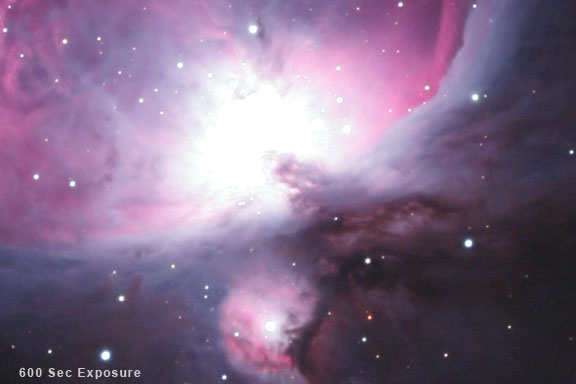
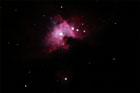
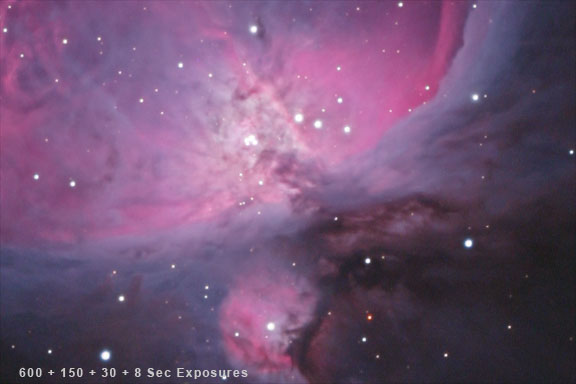
Some deep-sky objects, such as M42 and M31, exhibit such a large brightness, or dynamic, range that it is impossible to record detail in the bright core as well as the faint outlying parts in a single exposure. Long exposures are needed for the faint portions, and short exposures are needed for the bright parts. We can overcome this problem and create a high-dynamic range image by combining two or more exposures of different lengths into a single picture that captures the entire dynamic range of the object. This is done with a mask that blocks parts of one image while allowing the corresponding parts of the other image to come through. The best way to create a mask to composite two different exposures together is by using a blurred black and white copy of one of the original images itself. Creating a mask with this method offers the most accuracy and control because the mask is exact - it is made from the image itself, and its brightness and contrast can be adjusted in levels or curves. In this example, the long exposure will become the base image and the shorter exposures will become the layers on top of it. Each layer will have a mask. The secret to getting the blend perfect is that the mask for a given layer will be made from the overexposed portion of the next longer exposure, and the changes in the composite will be visible as we adjust the mask. Here we will use 4 different exposures, one 600 seconds, one 150 seconds, one 30 seconds and one 8 seconds. Each exposure is roughly two stops different than the next one. All were shot with a Canon 20Da at ISO 400. Layer mask keyboard shortcuts
Procedure
1. Open the Images in Photoshop All of the images should be calibrated and their background neutralized. They should be should be aligned and registered.
2. Copy and Paste the Exposures as Layers Open the Layers Palette using the menu command WINDOW > SHOW LAYERS. The layer's palette will allow us to composite multiple images together in various different ways with the masks. Copy and paste the shorter exposures on top of the longer one in order of exposure.
Click on the 150 second exposure image. SELECT > ALL EDIT > COPY Click on the 600 second exposure image to make it active. EDIT > PASTE Repeat this procedure for the 30 second exposure and the 8 second exposure. The 600 second exposure will be the background image. The 150 second exposure will be layer 1. The 30 second exposure will be layer 2. The 8 second exposure will be layer 3. Photoshop will then paste the short exposure on top of the long exposure, but the bottom image (the long exposure) will not be visible. It is still there though, as evidenced by the thumbnail image in the Layers Palette background layer. It is just hidden by the image in the layer on top. Clicking on the icon of the eye 3. Create a Layer Mask for Each Layer Click on Layer 1 in the layers palette to make it active. The background of layer 1 in the layers palette will turn dark blue to indicate that is the layer that is active.
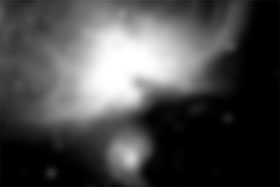
Click the Mask Icon in the Layers Palette to add a layer mask to Layer 1. It is the little circle in the square at the bottom of the Layer's Palette. Now you will see a white box appear in the top layer in the layer palette. This is where you will paste the mask. The mask is linked to the layer as indicated by the chain link icon between the thumbnail icon of the image in the layer, and the blank white thumbnail icon of the mask. 4. Paste the Previous Exposure into the Mask Click on the background layer in the layer's palette to make it active. SELECT > ALL and EDIT > COPY. This copies the 600 second exposure to the clipboard. Make the mask active in the Layers Palette - hold down the ALT key and click on blank white mask box in Layer 1. The image display window will now turn white to indicate that it is the mask. Paste the 600 second exposure into the mask for layer 1. Edit > Paste. The 600 second exposure will be pasted in as a black and white mask for layer 1. This is done automatically, since this mask is technically an alpha channel which is a black and white channel only.
Repeat this procedure with each layer, using the exposure for the previous layer as the mask for the layer on top of it. In other words:
5. Blur the Masks Click on a mask in the layers palette to make it active. Apply a Gaussian Blur - FILTER > BLUR > GAUSSIAN BLUR. You may have to experiment here with the size of the radius of the blur as this will depend on the resolution of the image that you are working on. Low resolution images will require a smaller pixel radius and high resolution images will need a larger radius. For a 1 megabyte image, try a blur of 2-3 pixels. For a 10 megabyte image, try a blur of 10 pixels. 6. Adjust the Brightness and Contrast of the Mask Click on the mask icon in the layers palette to make the mask active. Open the Levels dialog box IMAGE > ADJUST > Levels Drag the black point at the bottom left to the right until most of the sky background is black. Repeat this process for each layer mask.
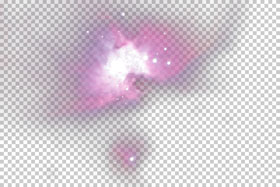
If you make only layer 1 visible by clicking its eye icon on, and the eye icons of all the other layers off, you will be able to see the contribution of the image in layer 1 to the final image. This is the portion of the image that is pasted down into the background image. The final image will be make up of parts of different brightness from each layer. The checkerboard pattern is Photoshop's method of indicating transparency, the portion of the image that will contribute nothing to the final image. The transparent portions will be filled in by the image on the background underneath this layer. Click the eye icon for the background layer to make it visible again. Now you can see how the composite is progressing. The curve for the mask for each layer can be adjusted in many different ways to achieve the exact result you are looking for. Work on one layer at a time with the layers on top of it turned off. Experiment by changing the black and white points and adding a point in the midtones and adjusting it. Watch the results in the image. 7. Tweak the Color of the Layers After you have worked your way up the stack, and adjusted the brightness and contrast of the masks, the layers should blend seamlessly into the background below it. The color however may not match exactly. Click on the icon of the color image on each layer, and adjust the color with Curves to make it match the color of the overall image. Since the mask is present, the corrections you make will only be applied to the core area of the composite.
8. Flatten the Image to Combine the Layers and Save the File Save this image with both the layers and the masks as a file with the Photoshop file format (.psd). Then you can experiment with it again at a later date without having to go through all of the previous steps. When all of the areas have been adjusted so that they blend together perfectly, combine the layers permanently by selecting Layer > Flatten Image. The image should now have a full range of detail from the bright core of the Trapezium to the outer loop. |
||||||||||||||||||||||||||
|
Back | Up | Next |