Video In addition to color in deep-sky astronomical objects being too faint to be seen visually, these colors are also usually fairly subtle in digital images. For daytime images, camera manufacturers usually increase the contrast and color saturation so that colors are vivid because this is what most people prefer. These enhancements are done during the in-camera image processing to the JPEG images. They are not applied to the raw image files however. Images produced with calibrated raw files shot with DSLR cameras are initially low in color saturation. This is the reality of the situation. Purists may want to leave their color images like this. Other astrophotographers may want to increase the color saturation in deep-sky images to enhance subtle colors and improve the image's aesthetic appeal. There are many different ways to enhance the color in DSLR images including the Saturation command, Selective Color, and Lab color curves adjustments. More advanced techniques use these methods in combination with layers, layer masks, and layer blending methods.
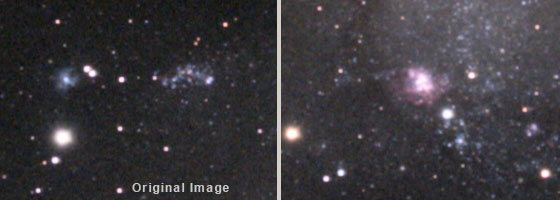
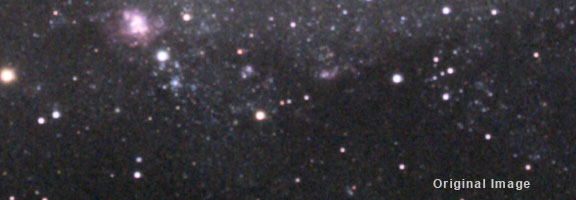
Above are two sample sections of the M33 image that have been enlarged 100 percent so that the effects can be seen at the images true resolution. Hold your mouse cursor over the image to see the improvement in the image that a saturation increase can provide. Photoshop's Saturation Command
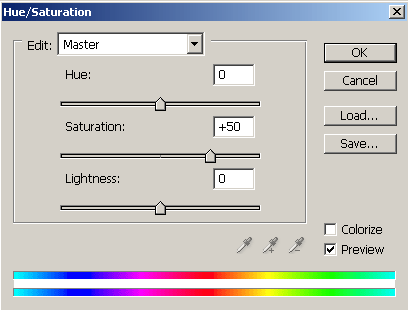
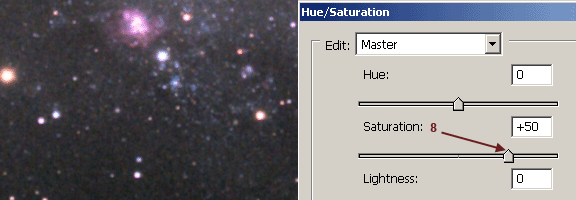
The easiest way to increase the color saturation in an image is to simply increase it with Photoshop's Saturation command: Image > Adjustments > Hue/Saturation. 1. Drag the saturation slider to the right to increase the saturation of all colors in the image.
This produces the desired effect. Red emission nebulae as well as blue star clouds and reflection nebulae in the galaxy are more colorful. The problem with this method is that colored background noise is also enhanced.
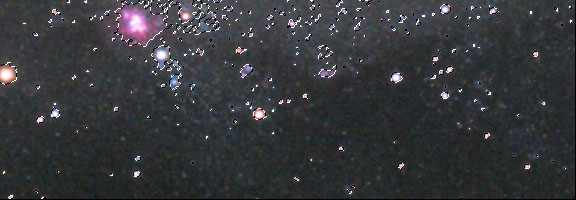
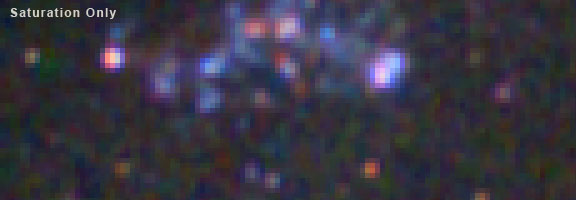
As can be seen in the image comparison above (enlarged 1600 percent), increasing the color saturation has taken a nice, neutral, low-noise background and made the color noise worse. This can be prevented by masking the background and increasing the color saturation of the highlights and midtones. Masking the Shadows We will use Photoshop's Color Range tool to select a mask for the shadow portions of the image. This will allow us to increase the color saturation in the highlights and midtones without aggravating the noise in the shadows. Go to Select > Color Range.
Pick "Shadows" from the pull-down menu, and check the box next to invert. This will select the shadow areas of the image, and inverting this selection will select all of the areas of the image that are not shadows.
The selection area will be marked with the selection display. Use Control H to hide the selection. It will still be selected, the selection display will just be hidden.
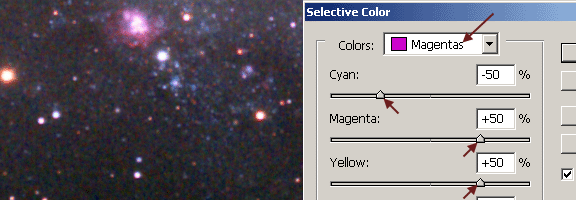
The Selective Color Command
In the final image seen above, we can see that we can get the same amount of color saturation increase by masking the shadows with a layer mask and then applying a saturation increase without increasing the noise in the shadow areas of the sky background. The selective color adjustment was just to add a touch more of red to the magenta emission nebulae in the image. |
||||||||||||||||||||||
|
Back | Up | Next |