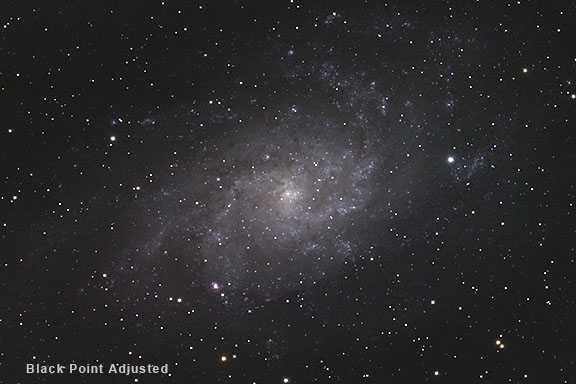
Video Ok, there really aren't any "shadows" in a deep-sky astronomical image. The term "shadow" comes from normal daytime photography where the darkest areas of an image were usually located in areas that were in shadow from the main light source. This term has carried over in astrophotography to mean dark, low-brightness detail just above the sky background. This dark shadow detail usually needs to be brightened to make it more visible. If the entire image is brightened then detail is usually lost in the highlight areas. To prevent this, the highlights can be masked and just the shadow areas lightened. In the old days before Photoshop CS, we had to make a mask and enhance the shadow areas manually. But, thanks to the miracles of modern technology and programming, we can now do this automatically with Photoshop's Shadows and Highlights filter. Open the working image of M33 and go to Image > Adjustments > Shadow/Highlight. Check the "Show More Options" box.
Generally, we can start out adjusting an image in order from the top to the bottom. Since there are 5 controls that affect the tonality and one that affects the color, there are many different combinations that can be tried. I usually set the amount to between 25 and 50 percent, depending on the image. For this image of M33, we will set it to 35 percent. Setting the Tonal Width slider to zero makes the adjustment affect only the darkest parts of the image. Setting it to 100 percent makes it affect the shadow and midtone areas of the image. Leave the Tonal Width slider to 50 percent. Leave the Radius set to 30 pixels for this image. Finally, set the black clipping point at 0.5. Be careful to monitor the histograms as we don't want to clip any significant shadow detail. Since we have started with the sky background around 30,30,30 and it has been lightened with the Shadow/Highlight command, we can bring it down a bit here with the black clipping point to get back to where we want it around 30,30,03.
Note that these settings are not applicable to every image. Each image should be adjusted individually based on the image's content and the user's goals. Shadows and midtones can also be lightened with a mid-tone adjustment in Curves, and their contrast increased in Levels, but you run more of a chance of blowing out significant highlight detail. Careful use of these commands however, can also produce excellent results. |
||||||
|
Back | Up | Next |