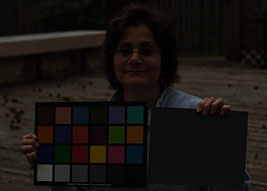
Video Our stacked image is still in linear form. All of the data that we care about is there, if our initial exposures were long enough. We now need to apply a non-linear curve to the image to make the details visible. First we will look at a normal daytime image that starts in linear form so we can see what is going on.
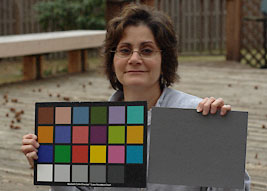
The image seen above at left shows what the linear data looks like. The image on the right shows what the exact same data looks like when it is stretched with the non-linear curve seen below at right.
The box above at left shows what Photoshop's "curves" dialog looks like when an image first opens. It may be a little confusing at first because there isn't a curve there, just a straight line. This line represents the pixel brightness values in the image and the input to output mapping as the line is changed into a curve. The input brightness values run along the bottom axis, with shadow areas on the left, midtones in the middle and highlights on the right. The output values run vertically from shadows on the bottom to highlights on the top. A grayscale gradient runs alongside these axes to represent these tones. Photoshop allows the user to click on the curve and establish a point that is locked on the curve. This point can then be moved to re-map pixel values. Raising a point on the curve lightens the corresponding tones in the image. As the slope of the line gets steeper, the contrast in that section of the image increases. In this non-linear curve example that we are using, the slope of the line in the shadow areas has not only brightened these tones, but also increased their contrast. The highlight areas of the curve have also been lightened, but their contrast has been reduced because the slope of the curve there is less. Multiple points can be established on the curve so that different tones in the image can be adjusted separately. Each point can also be adjusted by typing in numerical values into the input and output box at the bottom of the image. Applying a Non-Linear Curve to the Stacked Master Light Frame in Photoshop After the stacked master light image has been white balanced, the data is still in linear form. Although this data contains a tremendous amount of information, because it is in linear form, it is not very visually appealing. The linear data will usually look very dark and low contrast. This is because most deep-sky objects are faint to start with, and the pixel values that represent these areas are going to be low. If we have exposed long enough to get this data from the object up out of the camera and photon noise, we will be able to stretch it, increase its contrast, and make it more visible. We will accomplish this by applying a non-linear stretch to the data. This non-linear stretch will arrange and present the brightness levels in the image in the way that we are used to seeing it with our visual perception system, which is also non-linear.
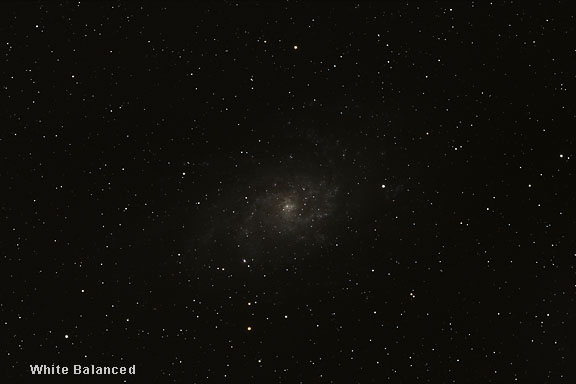
In the images above, we can see the results when this type of non-linear curve is applied to the linear data of the image of M33 that had been white balanced in the previous step.
The non-linear curve that was applied to this data is seen at the right. Four adjustment points were established on the curve:
There is nothing magic about these particular numbers. You can make a curve of your own that approximates this one and the numbers will be slightly different. The point is that the linear data is stretched so that the shadow and mid-tone areas are brightened more than the highlight areas. Here is the Photoshop ACV curve used for these images. Right click on it and save it someplace you can find it to load it later in the Curves dialog in Photoshop. |
||||||||||||||
|
Back | Up | Next |