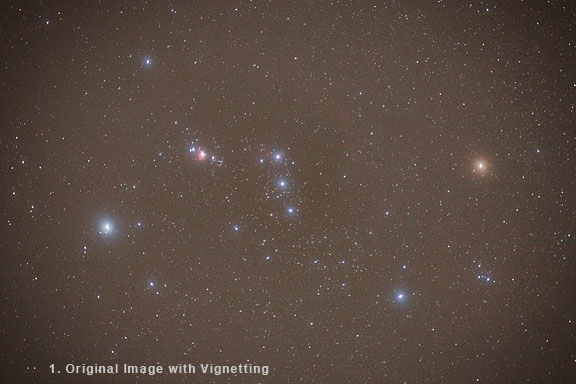
Video Now we will get back to processing our original example of a single light frame of Orion. For advanced astrophotographers, flattening the field will be done by dividing the light frames with flat-field frames. Unfortunately, you can't do division in Photoshop. So if you are advanced enough to be shooting flat-field frames, you should be doing this image calibration step in a dedicated astronomical image processing program, and not in Photoshop. However, if you are just getting started, and you are only shooting JPEG light frame images, you can significantly improve your images in Photoshop if they have tonal gradients or vignetting. In our example of Orion, which is a single JPEG original, we will use Photoshop to fix the color, tonal gradients, and vignetting in this image. The following steps use Photoshop CS2, although earlier and later versions of Photoshop can be used. Flatten the Field
1. Make a Copy of the Original Image Image > Duplicate
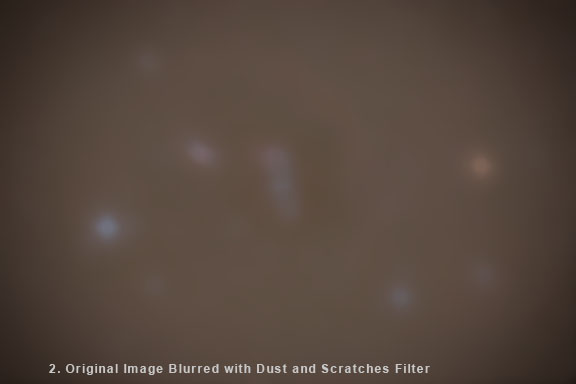
2. Blur the Copy Filter > Noise > Dust and Scratches
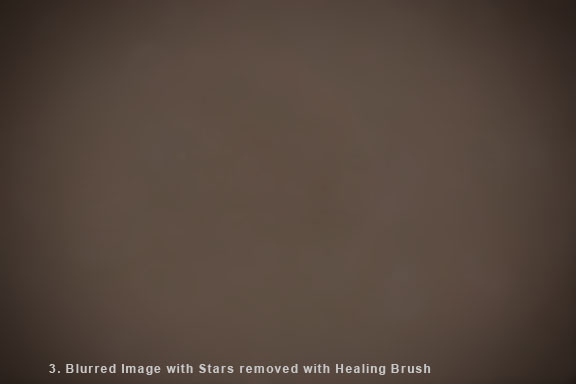
Increase the pixel radius in the Dust and Scratches filter until the detail is gone in the original image. We just want a featureless background that shows the vignetting and gradients. The amount of blurring necessary will depend on the resolution and file size of your original image. Adjust this setting until all of the details in the copy are gone. Here a radius of 50 pixels was used on the high-resolution image. 3. Remove Any Remaining Details with the Healing Brush or Clone Tool
Bright sections of nebulosity or bright stars may be impossible to completely remove by blurring. In this case, use the Clone tool or the Healing brush to remove these artifacts. The Healing brush can be accessed under the Tools Palette, or by simply hitting the letter J on the keyboard.
Set the brush to a fairly large size, and choose an area of the image with not detail that is approximately the same brightness as the area with the remnants of the star that you want to remove. Alt-click with the tool on this blank area and then move the tool to the remnants of the star and click again while painting over the star with the tool. The Healing brush usually works the best in this situation. Repeat for any other remaining stars or bright nebulosity in the image. The goal is to end up with a smooth image that doesn't have any artifacts in it and just shows the vignetting and gradients. If necessary a Gaussian blur can be applied to the image to smooth it even further. Go to Filter > Blur > Gaussian Blur, and use a fairly large radius on a high resolution image. 4. Use Apply Image to Subtract the Blurred Copy from the Original
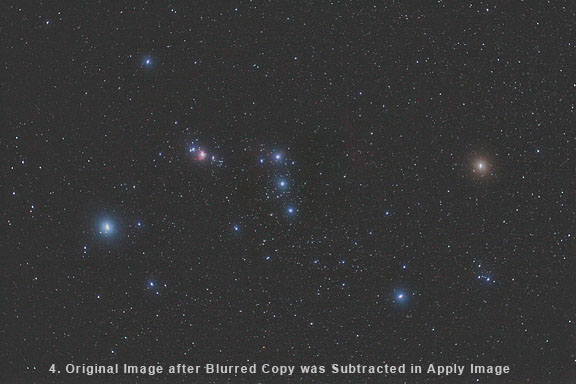
Click on the original image to make it active. Go to Image > Apply Image. Make sure that the original image is listed as the Target Image, and the blurred copy is selected as the Source Image. Change the blending mode to "Subtract". Put in 50 as the offset. This will brighten the subtracted image by 50 levels. This can be adjusted to taste.
The original image has been flat fielded by subtracting a blurred copy. In addition to removing any vignetting and gradients, the red color of the sky background has also been subtracted leaving a nice, neutral sky background. Specialized software such as GradientXTerminator, a Photoshop plug-in by Russell Croman, can be used to automatically remove vignetting and gradients. Background Subtraction Toolkit from Molecular Expressions can also be used to automatically flatten the background of an image. It is freeware. |
||||||||||||||
|
Back | Up | Next |