Video
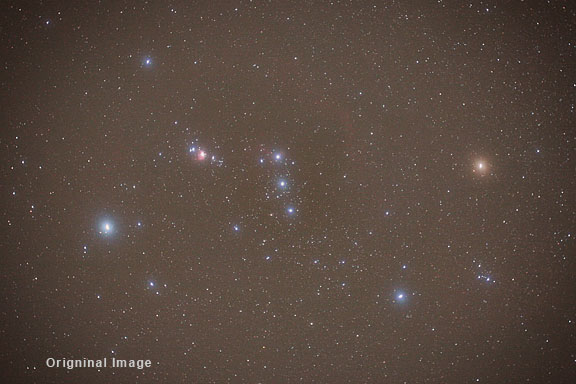
Open this tutorial image of Orion in Photoshop. It is contained on the CD-ROM in Practice > Orion folder. The very first thing we notice is the typical ugly brown sky so often recorded in long-exposure deep-sky astrophotographs taken with digital cameras when the white balance is set to daylight, even at dark-sky sites. Part of this particular image's color comes from the Canon 20Da's extra sensitivity to red, but this red / brown color is also recorded with normal digital cameras that still have their standard long-wavelength filter in front of the sensor. This color comes from the "foreground" sky influenced by the Earth's atmosphere. It is mostly faint airglow that is recorded by the camera but some local light pollution is probably mixed in from this observing site. We will subtract this foreground sky color when we adjust the image in Photoshop. Examine the Histogram
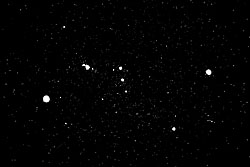
In Photoshop go to Window > Histogram. Looking at the image's histogram in Photoshop, we can see that this is a good exposure. The bulk of the pixels in the histogram, represented by the large "mountain" lie about 1/3 of the way from the left side to the right of the histogram. A histogram is a graphic chart that shows the distribution of pixels by brightness in the image. The relative number of pixels are represented on the vertical axis of the graph, and the brightness of the pixels on the horizontal axis. Black pixels are all the way to the left and white pixels all the way to the right, with corresponding shades of gray in between. The mountain represents the sky in the image where most of the pixels are approximately the same brightness. On the right side of the histogram, stretching from the mountain to the right edge, is a thin line at the bottom, representing the stars in the image, and their gradual fall-off from the bright core to the brightness of the sky background. On the left and right sides of the histogram, we can see breaks in the thin line at the bottom, and that the histogram does not reach all the way to the left or right edges where the darkest and lightest pixels in the image are represented. This means that we do not have any pixels in the image that are pure black or pure white. Because the histogram does not reach all the way to the edges, it means that there is dynamic range, or contrast, in the image that is not being used. Later we will stretch the tones in the image and re-define the darkest pixels as black and lightest pixels as white. This will increase the contrast of the final image and maximize the use of the available dynamic range. Next, we'll look at the darkest and lightest pixels in the image. This is done with the threshold command. It can be accessed under Image > Adjustments > Threshold. When invoked, the image will now look like this:
In the threshold dialog box, we can see the lightest pixels in the image if we move the slider all the way to the right and slowly move it back towards the center. The brightest stars in the image contain the brightest pixels. Likewise, we can see the darkest pixels in the image by moving the slider all the way to the left and slowly moving it back towards the center.
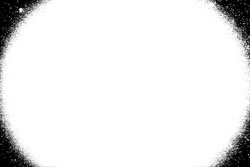
When we do this, we see that the darkest pixels are in the corners. As we move the slider more towards the middle from the left, the corners grow darker. This tells us that we have some vignetting in the frame. This should be corrected first. Cancel the dialog box without applying the threshold to return to the original image. We only used the threshold dialog to find the lightest and darkest pixels in the image for our information. Critical Examination While examining the image, it is a good idea to enlarge it to 100 percent or more to check the focus and tracking and other defects such as plane and satellite trails. If there are any serious issues which severely compromise the quality of the image, it may have to be shot again if only a single frame was taken. If multiple frames were taken and are to be combined, it's a good idea to discard an individual frame that is less than optimum because it will degrade the quality of the final composite image. At this enlargement, you will also get an idea of how much noise is present in the image. In this case it is very little because the 20Da is a very low-noise camera to start with, and because it was used at 33F ambient temperature, which helped reduce the noise even more. This image looks so good it doesn't even need a dark frame to be subtracted, which is a good thing because we didn't shoot one! In the next section we will discuss dark frames and how shooting them can greatly improve your images, even is you only shoot JPEGs in the camera. |
||||||||||||||
|
Back | Up | Next |