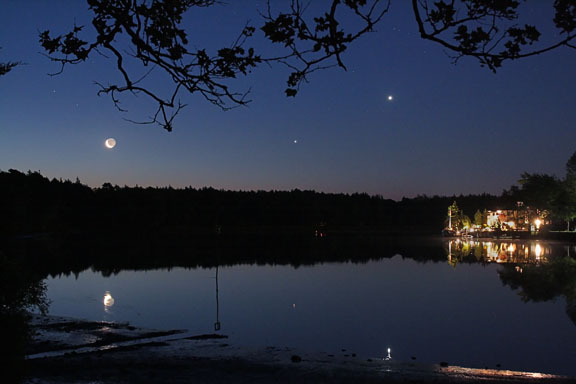
Wide-angle shots of the crescent Moon with Earthshine and bright planets nearby can make remarkably beautiful images. They are a great way to get started in planetary photography because they can be done with just a simple wide-angle zoom lens and DSLR camera on a fixed tripod. You don't even need a telescope. Pay attention to what is going on in the sky. Be on the lookout for visually interesting conjunctions between planets and the crescent moon and planets. Be on the lookout for interesting locations. File these away for when you get something interesting going on in the sky. Use a planetarium program for planning. Check out the morning and evening skies in advance. Especially look for young crescent moons next to bright planets like Venus and Jupiter. Young crescents are usually located low in the sky when the sky still has beautiful color from twilight. Young crescents also usually have Earthshine, that incredibly beautiful light reflected from the Earth that illuminates the dark side of the Moon. Magic Time You will want to shoot during "Magic Time". This is the time when the exposure for the available light for the sky matches the correct exposure for the crescent moon with Earthshine. It's hard to predict exactly when this is, start shooting early and continue until past when you think it looks best.
Shoot a lot of frames. Use the professional photographer's secret technique - bracketing. Bracketing simply means varying the exposure! Shoot some frames at 1 stop under exposure from the meter reading in the camera. Shoot some at 2 stops under, some at 3 stops under. Shoot some at 1 stop over exposure, 2 stops over, 3 stop over. Experiment! Sometimes the best image will come from an exposure that will be different than what the meter calls for in the camera. For some events, like a twilight conjunction, you will have plenty of time to shoot and experiment. For others, such as an ISS solar or lunar transit, they can be over in less than a second. You have to give yourself plenty time to get to your observing location early and get setup. Things always take longer than you might think. Follow the simple rules of composition. Don't always put the main subject dead center in the frame. Try putting the main subject at the intersection of imaginary lines that divide the frame into thirds. Compose the image so that the main subject is framed by something like tree branches. Put something interesting in the foreground. Move around. Try different angles. Try a low angle with the camera on the ground. Try different compositions, both vertical and horizontal. F/8 And Be There In the old days, photojournalists used to have a saying that they would use when they were asked how they got a particularly memorable news photo. They would reply "F/8 and Be There!" The F/8 part meant "know your equipment", but it was mostly a joke. It meant that you had to know your equipment like the back of your hand, but that the technical settings weren't as important as actually being there and taking the picture when there was a picture to be made. Remember that luck favors the prepared, but don't discount the random aspect of it. If you run across something that looks like an amazing picture, shoot it when you see it, because I can guarantee that it won't be there when you go back the next time. Know Your Equipment
Get to know how your equipment works. DSLRs can be complicated. Play with your camera in the daytime when you are just sitting around. Dig into all of the menus and sub-menus and try different settings. Experiment and practice until you know how everything works and what different settings do. Read and study the camera manual. Believe it or not, there is actually a lot you can learn in it. Since you don't have to buy film or pay to get it processed, it won't cost you anything to practice with a digital camera. Shoot a lot of practice images until you know your camera and how it works. Learn how to use your camera in full manual mode. Automatic settings don't always work with astronomical images. The great thing about DSLRs is that you can see the image on the back of the camera to get immediate feedback as to whether or not your shot was successful. You can check exposure, composition and focus by zooming in. If something is not right, you can correct it and still get a good picture. Most DSLR cameras and lenses come with autofocus set as the default. If you are in one of the automatic exposure modes, and the camera doesn't detect an object on one of the little auto-focus squares in the viewfinder to focus on, not only won't the camera focus on infinity, it won't even let you open the shutter because it thinks the subject is out of focus. Note that the infinity focus mark on most modern lenses is not accurate. Don't trust it. Use manual focus or autofocus. In addition to using the camera in manual exposure mode, it is a good idea to put the camera into manual focus mode also. There is usually a button on the lens that switches from auto focus to manual focus. Once you have the lens set to manual focus, you can use Live View and magnify the image 5x or 10x and focus manually. If this doesn't work for you, you can focus on something very far away. You can even do this in the daytime, but if you do, it is a good idea to tape down the focus ring on your lens so it doesn't accidentally move and throw off the focus before you go to use it. Live View Manual Focusing Tips Here are some tips to using Live View with manual focus for astronomical subjects: Autofocus You can, of course, try to use autofocus with a camera lens on something bright in the sky like the Moon, or a really bright star or planet. A secret here is to set the camera to only use the center focusing square. Read your camera manual to find out how to do this for your particular camera mode. Then make sure the object is exactly on that square when you use autofocus.
A problem you will encounter is that when you then re-frame the scene, the chances are that the object you focused on won't be on that focus square anymore. When you go to press the shutter release to take the image, the camera will then try to autofocus again. Not finding the subject on the central autofocus square, it may rack in and out of focus and then just give up trying. Even if you could trip the shutter at this point, the image will be out of focus. The solution to this problem is to autofocus on an object, and then turn autofocus off with the switch on the lens for Canon lenses, or on the body for Nikons. High Dynamic Range Images A more advanced technique involves shooting different exposures and compositing them together to create a High Dynamic Range (HDR) image.
Some scenes have a brightness range that is just too great to be recorded in a single exposure. For these kinds of scenes, we can record one exposure for the brightest part of the scene, and then a series of other exposures exposure for the less bright parts. These various different exposures are then composited into a single image using either layer masks in Photoshop or HDR software.
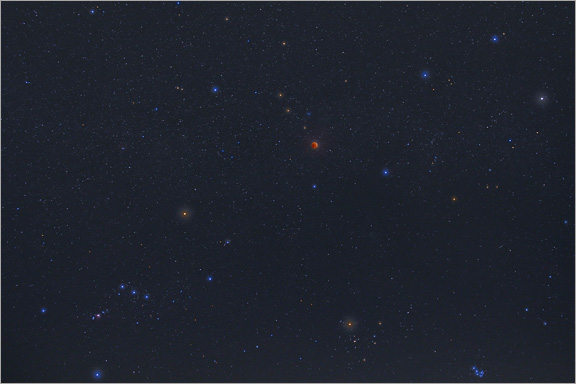
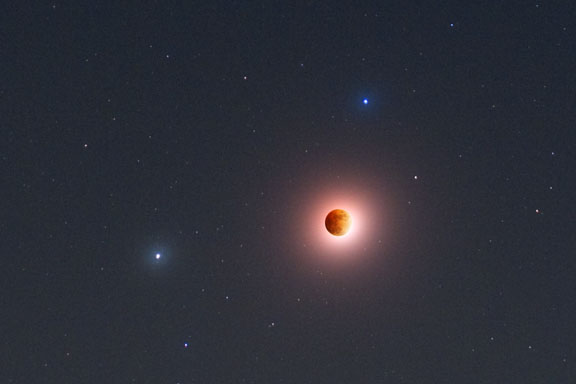
The above image of the totally eclipsed Moon in Leo is also an HDR composite. But this is an image that is not representative of the way the eclipse really looked. It takes more artistic license with reality to create an interesting image, in using a fog filter on the long exposure of the starry background to create the red glow around the Moon.
|
|||||||||||||||
|
Back | Up | Next |