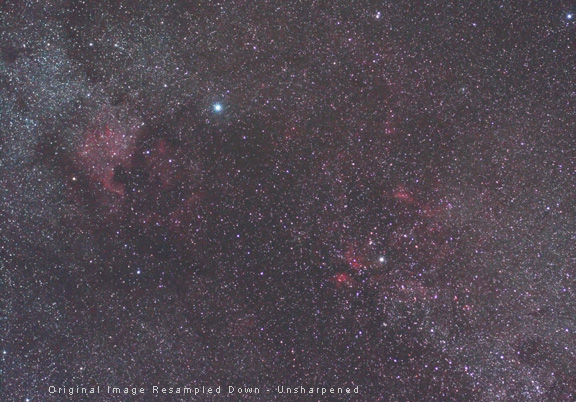
All DSLR cameras have a blurring filter in front of the sensor. This is to prevent moire, an interference pattern that can show up because of the relationship between the resolution of the sensor and the resolution of detail in the image created by the lens. Usually this lost sharpness is, for the most part, re-gained when the image is sharpened in the camera before the JPEG file is written to the camera's memory card. But remember that I recommend that we turn sharpening down as much as possible in the camera because it increases the noise in long-exposure astrophotos. The detail in long-exposure deep-sky images, as well as short-exposure high-resolution planetary images is also blurred by seeing. Resampling an image also reduces sharpness and detail. All of these separate factors act to reduce the sharpness and detail in an image. Luckily, image processing programs offer a way to get some of this sharpness back. In IrfanView to sharpen an image, use Image > Sharpen or the keyboard shortcut of Shift+S.
Unfortunately, Irfanview only offers one level of sharpening. It might not be right for all images, but since it is freeware, you can't really complain too much. More advanced image processing programs, such as Photoshop, offer much more control over the amount and type of sharpening with functions such as unsharp masking. Sharpening is a Balancing Act For astronomical images, sharpening is usually a difficult balancing act. Sharpening will make stars crisper, but it will also exaggerate the noise. In general, it is better to apply a little bit less sharpening than you think you need. But it's easy to experiment. Just be sure to work on a copy before you make any changes permanent. Sharpening and Archiving Once you have finished working on an image, it is best to save a copy of it with no sharpening applied. The amount of sharpening that will look best will depend on the particular output use of the image. For example, you will usually need to apply more sharpening to an image that will be printed than to one that will be displayed on a web page. Since you don't know the final size or the actual use of an image, or even if you do, you won't be able to anticipate all future uses, it's best to wait to apply sharpening until the very last step before output. If you apply sharpening to an image and then save it, these changes are permanent. You can't go back to the original un-sharpened data at this point. So archive your images before sharpening is applied, and then sharpen them when you know exactly what they will be used for.
|
|||||
|
Back | Up | Next |