Video Raw images do not have any sharpening applied to them in the camera, although most cameras embed the information into the raw digital file about the sharpening setting set in the camera menu that is normally applied to JPEG images. When the file is opened in a program like Canon's EOS Viewer Utility, or Digital Photo Professional, or Nikon's NikonView, this sharpening setting is usually applied as the default. Photoshop also applies sharpening as a default in the camera raw dialog. Original raw images are naturally going to look a little bit soft. This is a result of the low-pass, anti-aliasing filter in front of the sensor in most DSLR cameras, as well as the blurring effects of atmospheric seeing. It is recommended that a two-pass approach to sharpening be applied to raw images. The first round of sharpening attempts to regain most of the sharpness lost due to the low-pass filter and is applied after image processing and before the image is archived. The second round of sharpening is only applied to a copy of the original after the specific type of output is known, such as a desktop printer. Note that the appearance of noise present in the image will be made worse by sharpening. When done in-camera, any sharpening setting is a compromise between making the stars look better while at the same time making the noise look worse. That is why sharpening later in the work flow in an image processing program can produce better results. Masks can be made for shadow areas with the worse noise where there is no significant image detail, and highlights can be sharpened separately without aggravating the noise. Sharpening with Photoshop's Unsharp Mask Filter
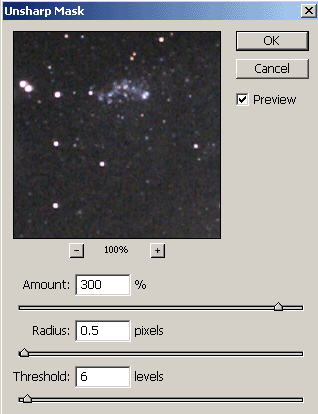
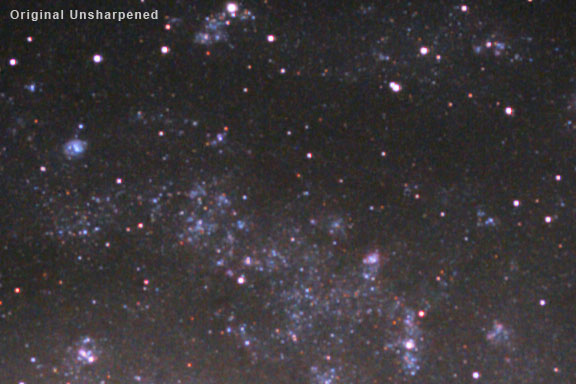
Here, an unsharp mask filter was applied to the working image of M33. It is seen here at 100 percent enlargement. An amount of 300 percent, a radius of 0.5 pixels and a threshold of 6 was used. This is probably more sharpening than is necessary. 300 percent was used to make the difference easily visible for this example. Normally, I would use an amount between 100 and 150 percent. |
||||||
|
Back | Up | Next |