Video
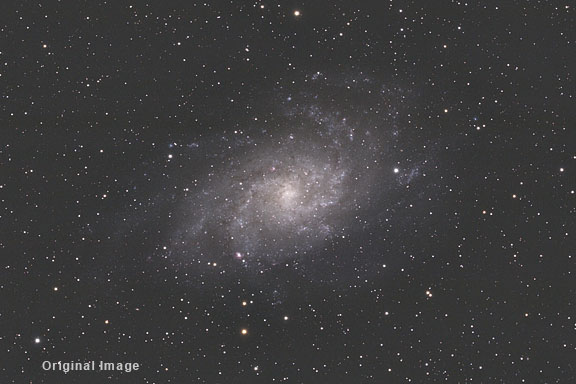
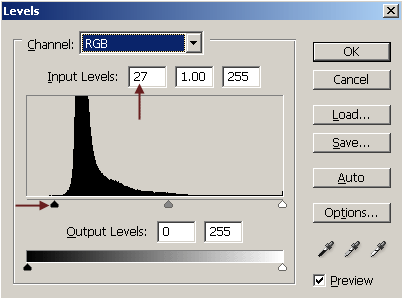
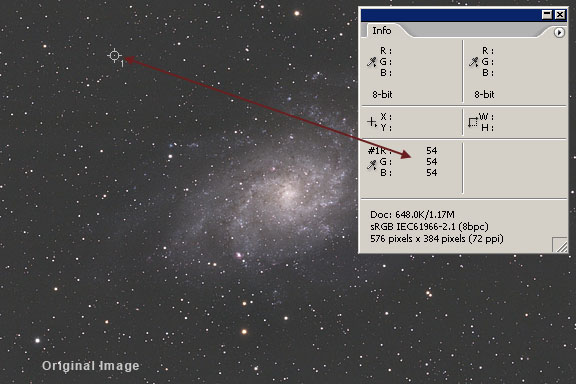
After neutralizing the color of the sky background, we may need to adjust the black point of the image if the tonal values of the blank sky background are too high. If your image is overexposed, and the sky background under the color sample point reads high, for example, anything more than about 50,50,50 after neutralization, then you will need to adjust the black point. For this section we will continue to use our example image of M33 that we have been working on. After neutralizing the sky background, the brightness of the sky background is too high at about 54,54,54. We will now adjust the black point of the image to correct this and make the sky background darker. Adjust the Black Point in Levels 1. Establish a color sample point with a 5x5 pixel box in a blank area of sky background. Go to Image > Adjustments > Levels.
2. While monitoring the pixel values in the info palette, drag the black point in the Levels dialog in the combined RGB channel to the right until it matches the aim point you have decided on. In this example, our aim point is 30,30,30.
You should not make the sky completely black at 0,0,0. Depending on the image, something in the range of 15,15,15 to 30,30,30 is good. It is better to err on leaving more room than necessary here since the image is being worked on in high bit depth, the black point can be adjusted again later if necessary, but once data is clipped, it cannot be replaced. The Sky is Not Black! Most people perceive the night sky as being black, but it is not. Even at the darkest observing sites on the planet, the sky is not seen as completely black, but rather dark gray once our eyes are completely dark adapted. It is only gray to our perception because the level of illumination is not enough to stimulate the rod cells in our eyes which are sensitive to color. The dark night sky actually has color. Digital cameras are sensitive enough to record the color of the night sky in long exposures, just as they are capable of recording detail and color in deep-sky objects that we cannot see visually. The color of the dark night sky color comes from airglow, interplanetary dust particles reflecting sunlight, starlight scattered in the atmosphere, and the stars in our galaxy. It is a dark red - brown color. Light pollution can also significantly contribute to color in the sky that gets recorded and may make the sky more red, or even green, depending on the type of light illumination causing the light pollution. Because inexperienced astrophotographers expect the sky background to be black, they will keep their exposures short to make it so. This is a bad idea because longer exposures are needed to fight photon noise. Short exposures also put detail from the object down in the noise of the camera. Some astrophotographers will expose the original images correctly, but then over adjust the sky background in an image processing program to make it black. When this is done, faint detail will be lost. Many people have their monitors incorrectly adjusted so that dark detail is lost. Printers also usually have difficulty with this kind of shadow detail.
|
|||||||||
|
Back | Up | Next |