White Balance White balance settings adjust the overall color of a scene appropriately for the color temperature of the ambient light. Indoor tungsten lighting is much more red than outside in open shade, which is more blue. Red light sources are called "warm" and bluer light sources are called "cool". You can see this if you set your camera to daylight white balance and then shoot a shot indoors lit by normal tungsten light bulbs, and then go outdoors and shoot in open shade on a sunny day with the same daylight white balance. The source of illumination inside is a glowing tungsten filament in a light bulb which is very warm. Therefore the overall image will have a red bias. The source of illumination in open shade is the blue sky. Therefore the light from it is very blue. White balance settings attempt to adjust for the differences in the color of the light source. Auto-white balance usually works well with daylight and more blue-illuminated scenes and not quite that well with warm light sources.
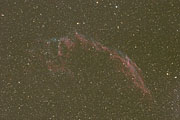
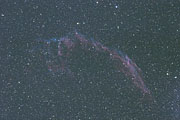
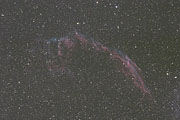
For astronomical use, if you are shooting raw file format, the white balance setting on your camera doesn't really matter. You can change the white balance later in software. However, if you are shooting JPEG the white balance setting does matter because this adjustment is applied to the image in the camera before it is written to the JPEG file. The white balance setting in the camera will also be applied to the small thumbnail image that is displayed on the LCD screen on the back of the camera during a preview when shooting raw. Even though the white balance setting is not applied to the raw file, it is usually saved in the IPTC header information that accompanies the raw file. When the image is opened in software such as Photoshop or Canon Digital Photo Professional or Nikon View, this white balance is applied to the image by default or by selecting the "as shot" option. Because auto white balance usually does not work that well with warm illumination sources, such as the sodium vapor lighting that now predominates most urban areas, it usually doesn't work that well for use for deep-sky astrophotos. On the other hand, if you just want a quick and dirty JPEG image in the camera, shooting a custom white balance set on the sky itself in a long exposure can work fairly well. White Balancing Astronomical Images To record the correct color of the stars with a stock, unmodified camera, the white balance should be set to daylight. Our eye evolved to see daylight from the Sun as neutral. Setting the color balance to daylight in the camera, or color balancing the white point to daylight white balance in subsequent image processing ensures that all of the star colors we see in an image are correct for our visual perception. To achieve correct color balance we can set the white balance to daylight in the camera, or shoot a white or gray card in sunshine, and use it to determine the white point adjustments needed to color balance the image to daylight white balance. If we have a modified camera with the long-wavelength filter removed or replaced with a different glass, the built-in color balance settings of the camera will not work correctly. In this case we can use a white sheet of paper, or an 18 percent gray card to set a custom white balance and apply it to our images. Place the blank white sheet of paper, or the gray card in direct sunshine at noon on a clear day. Move close to fill the frame with the paper or card. Be careful not to cast your shadow on it. Take an exposure of it with the camera set to the ISO that you will use for your long-exposure deep-sky images and shoot with the camera on auto-exposure. In both cases, the camera should expose so that both the white paper and the gray card are exposed for a middle gray. This is correct. Do not overexpose the white paper to make it white, we want it to be gray. The camera's meter will naturally underexpose it, making it gray, because the camera's meter thinks everything it sees is 18 percent gray. This gray image will be used for setting the white balance to daylight when we do a white point adjustment in later image processing. Since the image was shot in daylight, adjusting the white point to neutral will, by definition, set the white balance of the image to daylight. This same adjustment can then be applied to the deep-sky images to assure correct white balance. This technique of shooting a white sheet of paper, or a gray card, can also be used with unmodified cameras when raw file format is used. The same white point adjustments applied to neutralize the gray image are applied to the raw image. Shooting a gray card in sunshine can also be used to set a custom white balance in the camera for astronomical images taken later at night. If this is done before a deep-sky imaging session, this same custom white balance can be applied to the raw files of the long-exposure deep-sky images to achieve correct white balance. If you use light pollution filters with either a stock or modified camera, you should shoot a custom white balance with the filter on the camera. For narrowband filters, a custom white balance will not work. I keep a series of custom white balance frames of a gray card stored on an extra memory card. Before an imaging session with my modified camera, I pop it in the camera and choose the correct white balance for the filter I plan to use. If no filter is used, I simply pick the custom white balance gray card that was shot in sunshine with no filter. I keep this memory card write protected by sliding the write protect tab down on the left side of the SD memory card. After setting the custom white balance, I swap out that card for a larger memory card that I use to record the long-exposure deep-sky images. The Color of the Sky Don't be surprised if the sky does not turn out a pleasing color on the display on the back of the camera with a long exposure if the in-camera white balance is set to Auto, or Daylight, especially if the site has any man-made light pollution at all. Also, the night sky, even at the darkest locations, has color in it from the natural sky glow and possible faint auroral activity. This color is usually a dark brown. This sky glow is comprised of four components:
Some people prefer to make the sky background black on the theory that this is how the object would appear if you could view it from space. However, while it is possible to make the sky black by underexposing it, this is not a good way to do it. This will put any faint detail down in the noise of the camera. You can also make the sky black in subsequent digital processing, but this is not a good thing to do either because faint detail will be difficult to distinguish, and this detail will be difficult to reproduce. Other people prefer to filter out the light pollution and natural airglow, either in the camera or in subsequent processing, and make the sky background a neutral gray color lighter than black. This can be accomplished in camera by setting a custom white balance on the sky background itself, neutralizing the sky background with a levels adjustment, or by subtracting the sky background during processing. The first two methods are not as accurate as the last, but depending on your needs and how critical you want to be, they may work just fine for you.
Advanced Techniques
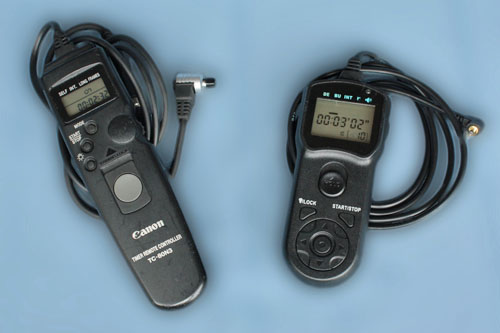
Controlling and Automating the Imaging Session If you are going to be shooting multiple sub-exposures for hours at a time, doing it by hand every 3 to 5 minutes can become extremely tiring and demanding. Luckily there exists hardware and software tools that allow complete automation of the imaging session with a DSLR camera. Although it is possible to automate several hours of imaging, it is not always a good idea to just let the camera run unattended for this length of time. Things can, and do, go wrong for no apparent reason. The camera battery or power supply can die. Guide stars can be lost due to passing clouds. Memory cards can become full. It is a good idea to periodically check on the progress of an imaging session by examining an actual image. This can be done on the LCD on the back of the camera by magnifying the image, or by opening the image in an image processing program and enlarging the stars at least to 100 percent enlargement. Focus and tracking can be checked in this manner. Focus can change during the night as temperatures fall, especially in fast optical systems, so re-focusing may be necessary. If you are going to gather multiple hours worth of data on a single object, and are not controlling your imaging session and automatically dithering between frames with a computer, it is also a good idea to pause the image gathering sequence at intervals, perhaps every half hour or so to dither. Focus and tracking can be checked, and the scope's autoguider turned of briefly while the scope is moved slightly. The guidestar can then be re-acquired by the autoguider, and tracking and exposures started again. Although not as effective as dithering after each individual exposure, dithering after a group of exposures, when several groups are taken, is better at reducing pattern noise than no dithering at all.
When automating an exposure sequence, whether using with a remote interval timer or software in a computer, it is important to program in enough time between exposures to allow the camera to process the image and download it to the memory card or computer. If the automation process tries to start the exposure before the download is complete, the camera may just ignore the command. This is especially important in older cameras that use USB1 for camera control where the downloads may be quite long. You should do some tests and time how long the downloads take and check to see exactly what happens with your methodology. Newer cameras usually have quite fast download times and the pause can usually be set to about 10 seconds without any problems. |
||||||||||||
|
Back | Up | Next |