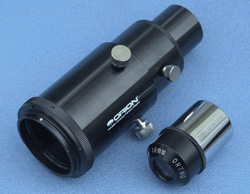
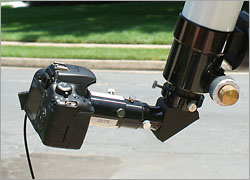
Eyepiece-projection astrophotography uses an eyepiece in the telescope and a camera with no lens. A special adapter is used that holds the eyepiece and mounts onto a standard camera T-mount. The other end goes into the telescope's focuser. The eyepiece projects the image directly onto the camera's sensor.
This type of astrophotography is used when a high amount of magnification is needed, such as for planetary or lunar or solar close-up photography. Increasing the magnification means increasing the effective focal length of the telescope. The focal ratio also increases, slowing down the speed of the optical system. Eyepiece projection is rarely used for deep-sky astrophotography.
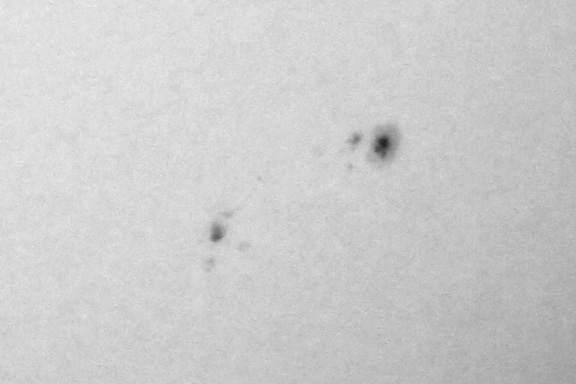
The amount of magnification is determined by the spacing of the eyepiece to the sensor. Varying the distance between the eyepiece and focal plane of the camera changes the magnification of the system. The correct exposure for close-ups of lunar craters and solar sunspots can usually be determined by a simple meter reading in the camera since the subject will usually fill the entire frame with eyepiece projection.
The correct exposure for the planets can be determined by trial and error through test exposures, and examining the image on the LCD on the back of the camera. Focusing Focusing can be difficult for eyepiece-projection photography. Because of the long effective focal lengths, focusing in extremely critical, but the slow focal ratios produce a very dim image. If your DSLR has it, Live View is the best way to focus with eyepiece projection.
It is also possible that you won't be able to reach focus with a diagonal and eyepiece-projection adapter because the focuser does not have enough "in" travel to reach focus because the eyepiece is an inch or two behind where it would normally sit in the diagonal. You will just have to test your particular setup and see if the eyepiece you plan to use in the eyepiece-projection adapter will come to focus. If it won't you will have to purchase an extension tube. Note that if a diagonal is used, the image will be mirror reversed. This should be corrected during image processing before the image is presented for viewing. When you employ the high magnification associated with an eyepiece-projection setup, you are normally trying to do high-resolution work of the planets, Sun, Moon, or double stars. When you magnify an image to this degree, you also magnify everything else, such as bad seeing, poor focus, vibrations, and poor tracking. Slower focal ratios mean longer exposures which compound these problems. If you are shooting the Sun (with proper safe solar filtration), or planets in the daytime, you may find it is very hard to see the LCD screen because the surroundings are so bright it washes out the screen. It can be helpful to use a black cloth, or even a coat, over your head and the camera to block out this stray light, and help you see the LCD for Live View.
|
||||||||||
|
Back | Up | Next |