When you first start out in astrophotography, focusing a DSLR can seem to be one of the most difficult challenges you will face. But, there are easy and accurate ways to focus your scope and camera lens.
Most daytime photography is done with autofocus lenses. Unfortunately, telescopes don't come with autofocus, and autofocus is hard to use with lenses for astrophotography.
Because cameras can autofocus in the daytime, not much attention seems to have been paid to facilitating manual visual focusing. Viewfinders are usually dim. They can be in very awkward positions when used with refractors and Schmidt-Cassegrains when the scopes are pointed overhead. Even when used on Newtonian telescopes, where the camera is in a very convenient position, not many people can consistently focus a DSLR by eye alone through the viewfinder. Do not count on being able to do this consistently.
Even simple camera lenses can be difficult to focus on a digital camera on a star field. Most new autofocus camera lenses now allow focus past infinity so the autofocus mechanism does not suffer a jolt when seeking focus and racking to the infinity setting. In the old days, it was simple to slap a lens on a camera, and rack the focus to the infinity mark, and have the photos come out perfectly focused. It is also much more difficult to focus a short focal length camera lens that focuses past infinity because you have less magnification to work with. In-camera filters will also change the point of infinity focus.
Many of these methods of focusing discussed below are by trial and error and are difficult and tedious because of the problem of repeatability in the focusing position of the focuser on the telescope or camera lens. It is especially bad with Schmidt-Cassegrain telescopes where mirror shift can be quite a problem. These telescopes focus by moving the entire primary mirror assembly, and the image shifts significantly when the direction of movement of the focus knob is changed. This can be overcome by always coming to focus from the same direction, or by installing a third-party external focuser and locking down the primary mirror.
The focal plane for most telescopes is not flat, it is curved, and this is normal. You generally don't notice it when using the telescope visually because eyepieces compensate for it, but you will notice it photographically. That means that stars in only one area of the frame will technically be in exact focus while the rest will be slightly out of focus. If your telescope has a curved focal plane, don't focus on a star in the exact center, focus on one about 1/3 of the way out from the center to the edge of the field. This will average out the focus so that more of the field will be closer to focus than if you focused on the center. The best solution to a curved focal plane is a field flattener.
Focus can also change during the night as temperatures drop, and the metal part of the scope assembly contracts. This can affect all types of telescopes. It is wise to monitor the temperature, and refocus periodically through the night.
Because of autofocus and the LCD display on the back of the camera, it seems that manufacturers have neglected the viewfinder display in digital cameras. In the old days of film and manual focus cameras, the priority was on developing the brightest, most high contrast view possible to make focusing less difficult. Those days are gone. Viewfinders in digital cameras are, in general, small and dim. Many do not offer interchangeable screens where a brighter screen can be substituted for the original screen. But, worst of all, there is not a single DSLR camera that I know of where you can remove the pentaprism and place a high-power magnifier on the groundglass to help focus an astrophoto. Luckily, this is not necessary any more because of the ability to use Live View at 10x magnification.
The right-angle attachments that camera manufacturers offer for DSLRs sometimes offer additional magnification that can be dialed in, such as with Canon's Angle Finder C, which allows a choice between 1.25x and 2.5x, but the view is incredibly dim. The optical construction also makes it difficult to focus unless your eye is exactly centered. Some people claim to be able to achieve consistent focus with this accessory, but it is difficult to use.
Diopter Adjustments
Many cameras now offer a diopter adjustment in the viewfinder. This should normally be adjusted in the daytime. The general method used is to let the camera autofocus on a subject, and then adjust the diopter until the view is as sharp as possible to the eye. Another method is to take the lens off the camera, aim the camera at a light, and then focus the diopter until the texture of the groundglass is in focus. Often there is enough diopter adjustment so that the user can focus the diopter so the camera can be used without glasses for eyeglass wearers with simple near and far sightedness. The Diopter will not, however, correct for astigmatism in the eye.
It should be noted that the performance of the human eye can change at night. Once the eye is dark adapted, the pupil dilates and lens aberrations in the eye affect vision more than in the daytime. Night vision can also become more myopic than daytime vision, so the diopter should be adjusted at night after dark adaptation for critical astrophoto work.
It may seem like a chicken and egg paradox, but it is best to focus the diopter at night after the lens or scope is focused on a star. Since it is so hard to visually focus through the viewfinder anyway, we are really only focusing the diopter so that stars are in focus on the groundglass for framing star fields with a wide-angle lens. Most focusing and framing for deep-sky astrophotography will be done with Live View for focusing, and by test shot for framing the deep-sky object.
Focusing Methods
With many of these focusing methods with a DSLR, you can examine the image on the LCD on the back of the camera and magnify it and this will help to make focusing easier.
With a refractor or Schmidt Cassegrain, the screen may end up in an awkward position and may be hard to view. When the telescope is pointed up, the screen is pointed down to the ground. With these types of scopes, you may have to take the camera off to view the LCD. Repeatedly doing this will cause wear and tear on the camera mount and allow dust to enter the camera, which will probably end up on the sensor. In these cases it helps to output the video to a laptop computer or external monitor. A much more convenient solution is to use a newer camera with an articulated LCD screen that can move and tilt at different angles to the camera body.
A star at a more reasonable elevation may also be used for focusing. Try to use a star that is at least 30 degrees elevation above the horizon to minimize atmospheric seeing effects. If using an SCT, the mirror should be locked after focusing to prevent mirror shift and focus change when moving the telescope back to the target object. Generally, if you can, it is best to focus on a bright star that is close to the object you wish to photograph.
|
Recommended Best Methods
The following methods are what I consider the best ways to focus a DSLR camera.
Software Metric Assisted - A series of images of a star are taken with the camera and software examines them to objectively determine the point of best focus by measuring the star sizes. This method requires a computer at the telescope.
Live View - The image of a star is visually examined at high magnification in real time with Live View on the LCD on the back of the camera. This method does not require a computer at the telescope.
Bahtinov Mask - Can be used for cameras without Live View. A test exposure is made and the star examined visually at high magnification on the LCD on the back of the camera. This method does not require a computer at the telescope.
A Bahtinov mask can also be used on cameras with Live View to assist in focusing.
|
The following focusing methods are listed in a general order of the worst methods listed first and the best methods listed last.
By Eye - If you are young and have excellent eyes, you may be able to get away with focusing on the ground glass of the camera's prism without any aid, but don't bet on it. Consistent focus can be difficult to obtain with this method. You will not be able to see any deep-sky objects through the viewfinder visually, with the possible exception of M42, the Orion Nebula.
Right Angle Finders - Nikon and Canon both make right angle finders which have a little
Barlow that will flip into the light path and give you 2.5x magnification. This may give acceptable focusing if you focus on a double star like Alcor and Mizar, but the field becomes very dark. Don't expect to be able to frame any deep-sky objects with a right angle finder.
If you do try to use it, adjust the diopter on the camera first on a star, after your eyes have dark adapted. Rough focus the star with the scope as well as you can by eye through the camera. Put the right-angle finder on the camera and adjust the diopter on the camera first. Then adjust the diopter on the right angle finder. Mark this position on the right angle finder with a pencil on a piece of white masking tape. Tape it down. Repeat this procedure for both positions of magnification. With the Canon right-angle finder, you will have two different positions for the diopter, one for the 1.25x and one for the 2.5x positions. Personally, I can't reach focus in the right-angle finder with my glasses on, so I set the whole thing up for night use with the glasses off. Remember to re-adjust the diopter on the camera for daytime use.
Hartman Mask, Scheiner Disk - Two or three holes are cut in a piece of plastic or cardboard and the mask is placed over the objective and the scope is aimed at a fairly bright star. The out of focus image will display two or three stars that will merge when the image reaches focus.
Ron Wodaski suggests using offset triangles instead of circular holes. The triangles should be cut so that the vertices are not pointing in the same direction. Each triangle creates 6 diffraction spikes that help gauge where the center of the star image is and when they overlap, the image is in focus.
The problem with a Hartman mask is that it gives dimmer images because you are essentially stopping down the aperture of the telescope. Stopping down the telescope increases the zone of the depth of focus. This zone is much smaller and focus is much more critical when the mask is removed and the full aperture of the scope is used. Therefore it is inherently less accurate than focusing at full aperture.
Visually, using a Hartman mask always becomes more difficult the closer to focus you get. There may be a range where you can't really tell if the focus is getting any better.
Diffraction Spikes - Two wooden dowels are placed in front of the objective at a 90 degree angle to each other. Use a fairly bright star to focus on. Outside of focus, you will see two spikes. As you get closer to focus, the spikes will merge into one and get brighter and longer. This method can work well because it takes advantage of the full aperture of the telescope, however there can be a bit of uncertainty as exact focus is approached when the spikes start to overlap.
Bahtinov Mask - This is a variation on the Hartman mask with an unusual pattern.
 |
 |
|
Bahtinov Mask
|
Bahtinov Diffraction Pattern
|
The diffraction pattern of a star viewed through the telescope or lens with a Bahtinov mask attached will form an "X" with a line through it. As focus is racked in and out, the line will move in relation to the center of the "X". The line will exactly bisect the center of the "X" when the scope or lens is in focus.
You can make your own very easily, or purchase one.
Bahtinov masks suffer from the same problems as Hartman masks and Scheiner disks, and all three depend of a subjective visual judgment.
Star Trail Test - A scale or index is constructed and attached to the lens or focuser so that the position of the focuser can be noted during the test. A series of test exposures is made and the focus is varied during a time exposure. The scope or lens tracking is turned off and the stars are allowed to trail across the film. A record is made during the exposure of which trail corresponds to the index marks on the focusing ring of the camera lens, or focuser knob or draw tube on a telescope.
The image is then examined under high magnification and the best focus is determined by the star trail with the narrowest width.
A black card placed in front of the aperture of the lens or telescope briefly between focus changes will help to differentiate settings.
Hybrid Method - The star trail focusing method is combined with a Hartmann Mask. This method was described in detail in an article in Sky and Telescope magazine by Chuck Vaughn in February 1991.
The mask should be oriented with the center of the holes on a north-south line so the double images don't overlap in the image. The method described above for the star trail test is used, and the image examined. When the two star trails merge into one with the thinnest line, the scope is in focus.
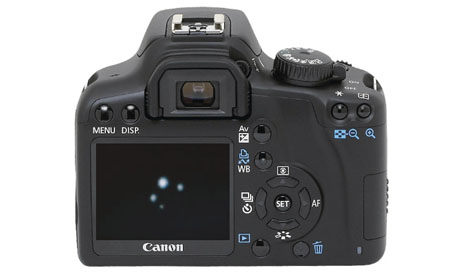
Autofocus - If your optical system is fast enough, and your DSLR has a focus indicator, you may be able to focus your telescope by watching the focus indicator (but not for Canon... see the next section). With system camera lenses, you may be able to focus the lens with the built in autofocus. This usually works better with longer focal length lenses that have fast focal ratios.
You may need to illuminate the viewfinder to position the star exactly on one of the autofocus spots. These are usually indicated in the viewfinder.
FotoSharp Telescope Focusing Adapter for Canon DSLR Cameras - The FotoSharp is an adapter ring, like a T-ring, that goes between your scope and your Canon camera. It has a small electronic chip that activates the camera's internal focusing sensors. You then put a bright star or planet on one of the autofocus sensors and adjust the focus of your scope until you hear the camera's focus confirmation beep, or until the green in-focus indicator LED comes on in the viewfinder.
Normally the focus indicator will not work on a Canon camera unless a Canon lens with electronic chip is attached. The FotoSharp adapter tricks the camera into thinking it has a legitimate Canon lens on it, so that focus confirmation will work. Canon autofocus indication will work down to about f/5.6 on most cameras, so it won't help if you have an f/10 SCT or an f/8 refractor or Newtonian.
The electronic chip used to trick the camera can be purchased separately on Ebay if you want to make your own adapter.
Parfocalized Eyepiece - A rig can be constructed with a female lens mount of the camera system to hold an eyepiece that is parfocalized with the focal plane of the camera. Even a lens cap can be used for this purpose. A high power eyepiece (4mm to 6mm focal length) should be used so that the eye's accommodation does not cause a problem. The camera is then focused at infinity by another method that is precise, such as knife edge or software, and the eyepiece holder is attached and the eyepiece focused by sliding it in and out of the tube until best visual focus is obtained. The eyepiece is then locked down in the holder and left there, or a parfocalizing ring is attached to the eyepiece and locked down so if the eyepiece is removed it can be returned to the exact same point of focus the next time it is used.
Knife Edge - You can try something like the Stiletto focuser, or the Mitsuboshi knife edge focuser from Hutech, or make your own knife edge focuser. If the knife's edge is calibrated to the focal plane of the camera, this can be an easy and convenient way to focus because no computer is required in the field. The down side is trying to use one with a scope like a refractor where the camera end of the scope is pointed down to the ground. Also, you can't use a Stiletto with really fast optical systems, and you can't use one on a Canon lens that electronically focuses because they won't focus without a body on them. Also, you can't use a knife-edge focuser on extended objects like the Moon or planets. It is also difficult to get the knife edge at exactly the same distance as the camera's focal plane.
Stellar Technologies Critical Visual Focuser (CVF) - The CVF uses a groundglass and magnifier in an assembly that is substituted for your camera. The image is examined at high power on the groundglass, which is parfocal with your camera, and the scope or lens is focused. The CVF is then removed from the scope and the camera substituted.
The CVF can work very well, but can be inconvenient to use when the scope is pointed overhead.
Digital Zoom - Take short exposures and zoom in on a star and examine with the LCD display on the back of the camera. Then you change the focus slightly and examine the image to see if the star looks smaller. Through a process of trial and error, you will eventually go through the point of best focus. When the star starts getting bigger you will realize this. The problem is going back exactly to the point of best focus. Unless you have some type of dial calibrator on your focuser, it can be difficult to know exactly where the point of best focus was and to return to it.
Live-View Video - Video from the sensor in the camera is displayed on the LCD on the back of the camera in real time. Live View is now offered on almost all of the latest generations of DSLR cameras.
|
|
The stars of the Trapezium enlarged 10x with Live View for focusing on the LCD on the back of the camera.
|
Normally a DSLR uses a mirror to send the light that comes through the lens to the pentaprism where it is viewed with the eye for focusing and composition. Because it is diverted by the mirror, and blocked by the shutter curtain, this light cannot hit the CMOS or CCD sensor to be displayed on the LCD for focusing purposes.
With Live-View, the mirror is flipped up and the shutter curtain opened, and the image is sent from the sensor to the LCD display on the back of the camera. This video display can also be output to a separate monitor or to a computer for real-time focusing.
The live-video feed out of the camera can be fed to an auxiliary monitor or television where it can be viewed in a more comfortable position if the scope is pointed overhead where viewing the LCD on the back of the camera would be in an awkward position. It is also possible to view live video in real time on your computer monitor through software supplied by the camera manufacturer and other astronomical camera control programs.
Live-View is not sensitive enough to show deep-sky objects or faint stars. You will need to use a bright star to focus on.
Increase the magnification in Live-View to 10x to make focusing easier and more accurate.
Gold Focus is a combination of a special hardware focus mask and software to analyze the diffraction pattern of a star created by the mask.
Test Exposures and Software Metrics - Computer programs like Images Plus and Maxim DSLR contain focusing modules. You'll need a computer or laptop to use them at the scope. With these programs, a star is selected in the field and a short test exposure is downloaded. The computer then continuously downloads short exposures, and the star is examined as the telescope is focused. When the star is at its smallest diameter, the scope is in best focus. Some programs examine the star and give a numerical readout of the stars diameter or FWHM (Full Width Half Maximum) to assist in determining focus.
Using this type of software is an excellent way to determine focus. It takes into account all of the variables involved in focusing because it examines the actual final image on the chip. It does not matter if, say, the optical viewfinder focus is not precisely coincident with the focal plane of the CCD or CMOS sensor.
The downside is that you have to be setup to use a computer next to the telescope, which can be somewhat of a hassle if the scope is used in the field at a remote observing location.
On nights of bad seeing the focus star's diameter can change because of scintillation, making determination of the point of best focus problematic. In this case, a fainter star can be used with longer exposures. This will help average out the effects of seeing, but will take longer.
Another difficulty is that during the focusing process you really want to go past the point of best focus to be sure you have, in fact, seen the point of best focus. Then you have to go back and find that point of best focus again. It helps to pay attention to the numerical readouts in this case and note the numbers for best focus, and then try to find that position of the focuser again by trail and error. Note that these numbers can change due to seeing, even if the focus is not moved.
Make sure that a star that is selected for use in focusing is not saturated, especially if you are going to use the brightness readout to determine best focus. You may have to change the ISO or exposure time to ensure that the star is not overexposed, depending on the brightness of the star.
If you have a motorized focuser, some software can automate this entire process.
Live View and Software Metrics - This method is very similar to the previous method, but software such as BackYard EOS or AstroPhotography Tool is used to provide a numerical readout of the FWHM, or Half Flux Diameter (HFD) to indicate the size of the star. When these numbers are smallest and the diameter of the star is smallest, the star is at best focus.
A number of Live View display frames can be averaged to deal with mediocre or poor seeing. The ISO or shutter speed should be adjusted so that the star is not saturated.
The downside to using software metrics to focus is that you need a computer at the telescope.
|
Important Live View Tips and Tricks
Use manual exposure and manual focus.
Use ISO 1600, bulb shutter-speed, and the lens' widest aperture.
Use a bright star or planet to focus on.
Eyeball the focus through the viewfinder to get close to focus before you try to use Live View!
Zoom in to 10x to focus.
|
Focusing Camera Lenses
Most modern auto-focus camera lenses will focus a little bit past infinity. This can present difficulties in focusing on stars at infinity, especially in the dark at night.
Some of these lenses are capable of focusing on a star with the camera's auto-focus mechanism, but the accuracy goes down as the focal length of the lens gets shorter, and the aperture of the lens gets smaller.
To auto-focus on a star, it is also necessary to have the star placed exactly on one of the small auto-focus points in the camera's viewfinder. These can be especially hard to find in the dark. Some cameras illuminate these auto-focus points, but then they can be so bright as to make the star difficult to see. In these cases, it may be necessary to shine a red flashlight into the camera lens at an angle that illuminates the field enough to make the auto-focus areas visible so a star can be placed on them, but not bright enough to make the star invisible.
It can also be difficult to keep the star on the auto-focus point long enough to achieve focus if the camera lens' focal length is long enough to show pronounced drift due to the Earth's rotation if the lens or telescope is not mounted on an equatorial mount that is tracking the stars.
If you can't get an accurate focus with the camera and lens on auto-focus, you can try using some of the various methods listed above. A right-angle finder's 2.5x magnification will work better on lenses of long focal length and less well on wide angle lenses. This is pretty much true of Hartman masks, diffraction spikes, and examining stars on the camera's LCD screen. All of these methods work better with longer focal lengths. Software assisted focusing on a computer or laptop or live video-out focusing work well, even with short focal length lenses.
Another method that works with wide-angle lenses is to autofocus on an object that is very far away in the daytime, and then tape down the focus on the lens, and turn off the auto-focus mechanism on the lens or camera body. This can also work with lenses of longer focal length, but the object on which you focus on needs to be farther and farther away as the focal length of the lens gets longer.
Be aware that many zoom lenses are not par-focal throughout the focal lengths of the zoom lens. This means that each focal length may focus at a different point for infinity focus.
On auto-focus lenses, also note that the true point of infinity focus does not always coincide with the infinity mark on the focus distance indicator on the lens barrel. This is particularly true for zoom lenses, especially those that are not par-focal throughout the zoom range.
|
Focusing
Software-assisted metric focusing is the most accurate method of focusing.
Live-View video at 10x magnification is the easiest method of focusing.
A Bahtinov mask can work well for focusing point sources, but can't be used on extended objects. You can, however, just focus on a star and then move the scope to a planet or the Moon.
If you don't have a Live View or a computer, just take a test exposure of a star through a Bahtinov mask and examine the image on the LCD on back of camera at high magnification.
Autofocus can work if the optical system is fast enough and the star is bright enough and located exactly on the autofocus spot.
Be aware that many auto-focus camera lenses will focus past infinity.
Knife-edge focusers like the Stiletto and Mitsuboshi can be accurate and easy to use if you are familiar with knife-edge focusing.
At an absolute minimum, use the additional magnification found in a right-angle finder to focus a star, and then double check it by taking an exposure and examining the star at high magnification on the camera's LCD. Tweak the focus a little bit on each side of the best apparent focus to see if you can improve it. Adjust the exposure so the stars are not saturated and over-exposed. Don't forget to adjust the diopter on your camera's viewfinder before you try to focus visually.
The worst way to focus is by eye alone through the viewfinder without any additional magnification.
Once you have achieved focus, lock the focuser down. If it is a lens, tape it down. Be careful that the focus does not change in the process of locking it down.
Refocus periodically during the night especially if the temperature is changing.
|
|